

This is a site about figures, collectables, and hobbies, most notably centering around giant robots and the assorted fetishes that come with that genre.
However, occasionally, I’ll let a little bit of that other netherworld bleed in.
It’s a little known fact that in my spare time, or at this point more like whenever there’s a special occasion that requires an extra-special hand-made gift, I fancy a bit of clay molding and sculpting. It’s a relatively underdeveloped talent, being something that I only make use of under rare circumstances. I do document each and every one of my creations, though none of them are extensive enough for a post on Supar Robo. This one, however, has been documented to its fullest with detailed Work in Progress shots, to showcase the long, winding road taken to get to the product seen above.

…I say that, but here’s the entire kart section molded and on the pan, ready to be baked.
I started my sculpting hobby roughly two years ago, starting with Super Sculpty III polymer clay, which is still what I use today.
For those unfamiliar, Sculpty is a general all-purpose polymer clay, coming in little blocks of all the colors of the rainbow and beyond. This particular clay is rather soft, and can be kneaded by the fingers pretty easily. Downside is that it’s tough making rigid shapes with, and fingerprints are the bane of my life when working with these.

Polymer clay is kneaded, molded, and sculpted by hand first while it’s soft, and never truly hardens. As such, it’s easy to accidentally press down on an unintended section and cause indents and thumb prints everywhere.
Such can be seen above, around the windshield/dashboard section of the kart, where the sides and top are very rough, seemingly pick-pocketed. Had quite some trouble molding that blue section; at first the slope of the front was too steep, had to cut and shave it down a good amount. Figuring out proportions and piece shapes of the kart based on the highly ambiguous reference images also wasn’t great fun.

Throwing it into an oven and applying this mystical force known as heat will harden the clay, solid as rock. This process alone is a hard-mastered skill that takes much experience to grasp. Knowing how long to bake a piece without either scorching it, causing air bubbles to erupt, not hardening it enough, or straight-up setting the stuff on fire takes much refinement and experimentation.
The above shown is the main canopy section, combined and hardened as one, and painted over in Strike Blue. The original blue Sculpty was legitimately jell-o, and the texture and color that resulted after the baking was highly unfavorable, therefore I had to paint away all the blue sections with more blue.

Tires stacked and ready to be mounted.
Had quite a tricky time making these round and consistent in size. I swear I made at least 8 of these damn things; each one would either turn out too small or too large. The final ones are in no way round nor consistent in size, but I kinda just gave up, feth it ship it.
I went out of my way to make this whole thing as accurate to the in-game sprite as possible. Including adding texture to the tires. Well, not really texture since it’s just grooves in the tires, but that was harder to achieve than one may think. Had to find several correctly-sized rods, tape them down on my table, and roll the still-soft tires across them evenly to unlock texture pack.

Now, the tires aren’t actually that plain ugly yellow. They’re supposed to be a shiny bronze, or dull gold. I figure a metallic orange would yield roughly the same result, so to do so, a base coat of silver acrylic is added. Once that’s dry, I painted over it with some clear orange paint to achieve the metallic effect. Doesn’t look the greatest to be honest, but it gets the job done.

Rollbar was rather tricky; when baking, had to make sure it stayed the correct size and didn’t warp in the oven, otherwise it would be unable to fit on the rest of the kart.

Hardest part done. The kart itself is what I dreaded making most – the amount of pieces put into creating it is kinda madness. Some of it is scarily fragile, like the exhaust pipes and side rail-guards.
I should also note right now, for the record, that the mushroom on the front is in no way painted by hand. I have another 9000 years to go before I reach that level of micro-painting skill. I cheated a bit and printed out a graphic on white card-stock generously provided by Google Images. A little bit of tacky glue on a white circle of clay and the deed is done. Yeah it looks kind of tacky, but not gonna lie – that entire section was more or less of an afterthought…
“Oh right the kart has that little mushroom on the front doesn’t it? I’ll treat myself to another Coke tonight if I can get it done in under 10 minutes.”
*print*
*cut*
*paste*
“This one’s on the house, self.”

The wheels are actually roll-able. Yeah. I made it happen.
The system itself is pretty sketchy; I went ahead and bought a set of hat pins at JoAnn’s, which were roughly the width I needed. I cut the tips off the pins, and used the remaining sticks to make the wheel axles.
The wheels themselves are glued onto the axles, and it turns by moving inside the car body. You would think that it’d be more effective and practical to simply have the wheels turn on the axles, but it was easier for me to glue the wheels to the metal rods rather than find ways to lock the wheels on them and still make them roll. Not gonna lie, I’m thoroughly surprised that the axles still turn in that giant thick mound of blue clay, but hey what works works.

Note how the wheels aren’t…ahem…round. At least not completely. Come on it’s hard to make perfect geometric shapes out of material that’s about as solid as jell-o.
I did also try to carve some of the details of the main body on there. That turned out less than superb, as can be seen by the little vent grooves and whatnot.
I had originally intended much of this project to end up just being raw clay, with minimal painting, but…that didn’t quite work out. The glossy Strike Blue on the main body turned out relatively well; the glossy blue is there, but it’s highly diluted. It has this awkward property where fingerprints dull the finish down, and dust clings to it like a newborn to its mother’s breast. Guess house paint doesn’t quite work as well on small crafts as does…well, craft paint.

Alright, the Kart is done, now what about its drivers?
Went ahead to carve Toad first, who’ll be in the driver’s seat.
Upon carving out his body though, I ran into a slight hiccup…

So it turns out, the seat piece is really thick. Why did I make it so thick? I’m not sure, I wasn’t really thinking about the driver yet.
I went ahead and carved out the section that’s gonna seat Toad’s plump little behind. Sort of cheating in a way; it’ll appear as though he’s sitting in the seat (hopefully) but he’s actually lower than the real thing.

Getting the feet right was the worst part. Toad does not have legs. He has feet. Making it look as though they were in the kart body while still connected to the body and stepping on some sorts of gas pedals was somewhat of a challenge. A lot of fiddling was involved to carve them down to the correct size, position them correctly relative to the body, and also make sure they didn’t obstruct the steering wheel.
Yeah the arms are kind of awkward, leave me alone. It’s supposed to look like he’s turning to the right…
THOSE FINGERS THOUGH.
Sculpting individual fingers about a millimeter in length each, and getting them into a certain position while maintaining the general look of a hand wasn’t my favorite part of this project. I just gotta say that I have a burning hatred against sculpting manipulators, especially human-esque ones, and I do personally believe they always come out looking like a fusion of drunken tapeworms more than anything else.

The head…Toad’s head…the part of this entire sculpt that went so horribly wrong.
Shown above is the original sculpt of the head. I thought it was relatively passable. Nice proportion between the big white cap and the actual head segment itself.

There it is! Toad in the kart, complete! The head shown here is the original head I had sculpted for Toad. Juxtaposing this image and the completed picture at the top of this post will yield a significant contrast though. I hadn’t realized what was really wrong with the sculpt until it was too late.

We’ll come back to that later. For now, Koopa’s getting on his feet.
Now, in the video game this is based off of, (Mario Kart: Double Dash!!) Toad is paired with his female counterpart, Toadette. The reason Koopa Troopa is his partner here will be explained below.

Starting with the basics: the shell, of course. I loved these designs in-game, always have. Tried to replicate the groove lines on it as best I could, though I’m fairly off.

Underside, arm sockets and all.

Adding in those spaghetti-thin limbs.

Man sculpting that head was not fun. Less so than Toad’s head. However, while Toad’s head may seem much more simplistic, consisting of basically two different-sized half-spheres, Koopa was surprisingly much easier to construct. Feel like I nailed him fairly well.

Baked, put together, glued onto the kart! Eyes are painted, along with his mouth under his big fat nose. Once again, making those hands required running through Hell blindfolded.
Notice how Toad has suddenly been decapitated. Koopa’s a deadly customer.

So, I basically looked at Toad’s head after finishing Koopa up and thought, “man that looks really weird. Something’s wrong with Toad.” So I proceeded to subject him to capital punishment, removed his cranium, and tried to identify the source of the anomaly.
Eventually I determined that the big white hat was too large; it had to be skimmed down. Big mistake. Quite the opposite; it turns out the hat was fine, the actual face-head area itself was too large. However, as I failed to realize this in time, I ended up sanding down the hat segment considerably, and only making Toad’s face look fatter.

End result? It looks really funky now, almost unbearable. The one part of this sculpture I’ll never forgive myself for.
Now, when I realized this, why didn’t I just go ahead and make Toad’s head again from scratch? Several reasons:
- I put way too much effort into trying to get that segment right just to fail. Ended in one of those, “screw it, ship it” moments.
- As this was a birthday present (will be elaborated upon shortly) my deadline was fast approaching, couldn’t stop to go back and rectify this blunder.
- If I made the actual face section any smaller, it would have looked very out of place on the torso. As there is really no neck, having a tiny circle on a large surface area that is the collar stump would look severely out of place, like a ball on a large table.
- Koopa looks relatively nice. Pay attention to him, ignore Toad.

Final touches? Well it wouldn’t be Mario Kart without the insanely entertaining items that make the franchise now would it?
I had originally planned to have Koopa hold a Golden Mushroom as its item…however I quickly realized there was really no way for that character to get that item in the game…it’s Toad’s Special, and therefore in this combination only Toad would really be able to wield it. Therefore if it’s not canon, I can’t make it. (Just kidding, that’s a really sophisticated excuse for, I don’t have legitimate gold paint and I didn’t want to spray the mushroom.)
So then I thought I’d make a Blue Shell of Death instead. But then the realization that the wings would be extremely delicate (there’s enough of that on this sculpt already) and likely slap Koopa in the face, I decided against it.
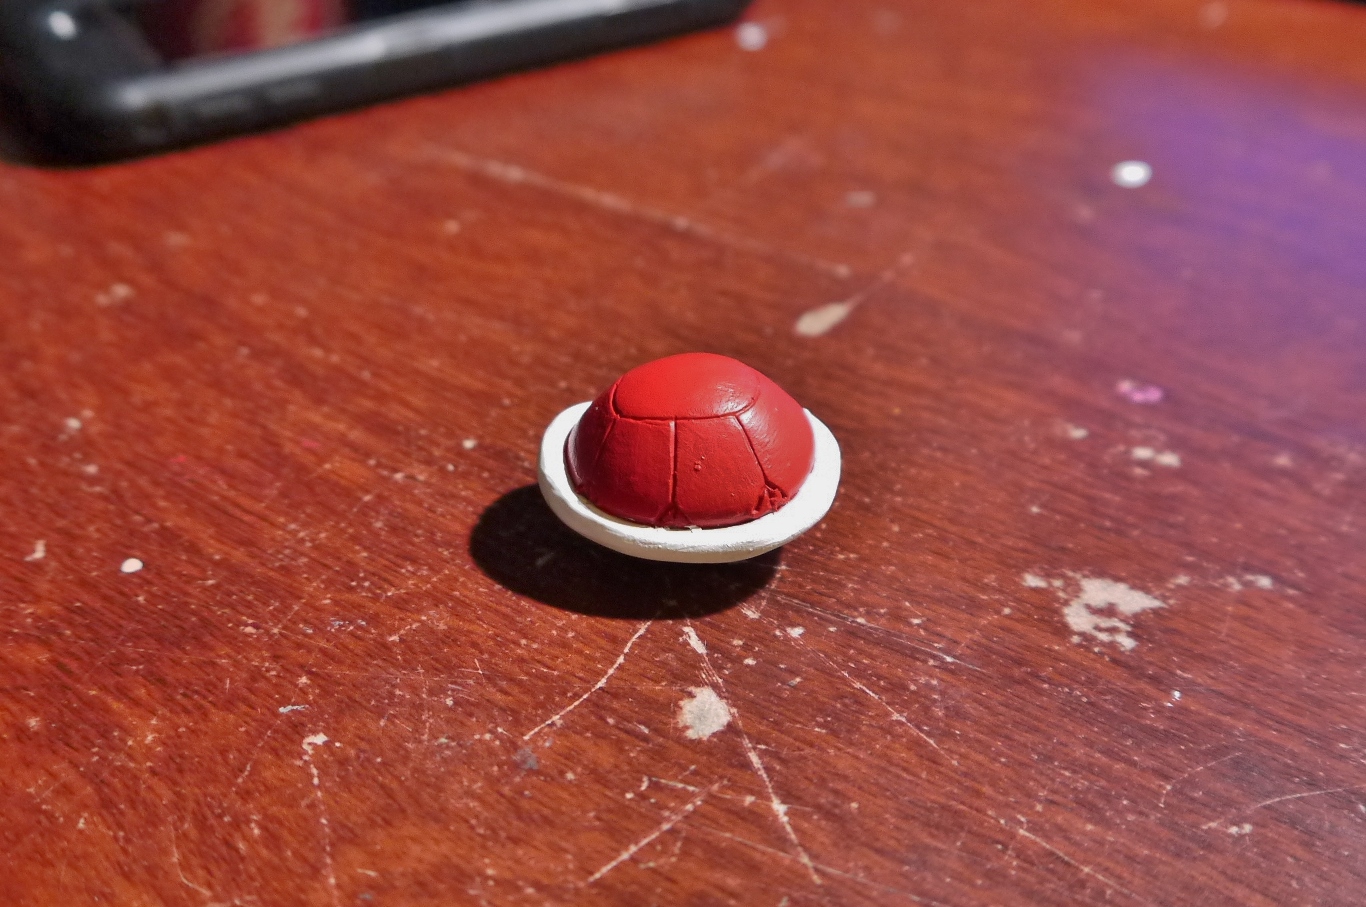
Ended up just going with a basic red shell. Same sculpt as Koopa’s original shell, a little less refined since it’s the last piece of this long puzzle, and added hastily to wrap the whole thing up.

Do you hear that? We’re done here.
My god this was a painful and long journey. I can safely say this is not my finest clay creation (I consider this to be) but it certainly is one of the most sophisticated and difficult things I’ve ever made.

So I think the big question to ask now is, why? I’ve gone this entire post with little to no background information on why this little sculpture came into being, and why it is what it is. Now that you know how it was made, here’s why it was made…
So upon unlocking special achievement [obtain girlfriend] I proceeded to lend her my Nintendo Gamecube and all my games for it, since she was a pretty big Legend of Zelda headgeek herself, I figured I’d give her a chance to play through Wind Waker and Twilight Princess on the GCN.

At the same time, I lent her Mario Kart: Double Dash!!, which quickly became a favorite pastime when we were together. The matches got rather…competitive.
She’s more skilled than I am at the game now though.
So her birthday was coming up, (September 27) and I figured, “hey, we enjoy Mario Kart a lot, might as well make her favorite combo characters for her birthday!”
And lo and behold, this sculpt was made. I was actually originally going to make my favorite combo and main kart in the game too, to go alongside her Toad Kart (I main Baby Mario with Paratroopa on the Para Wing) but after actually making the Toad Kart…yeah no, never again.

Lined the shells with Sharpie at first, then fine tip Gundam Marker, as it produced better results.
Koopa Troopa’s left arm is extremely fragile. It’s shallowly glued into Koopa’s main body, and could snap off pretty easily, especially with the weight of the red shell bearing down on it. Gotta handle carefully.

A final little thing to note is that Koopa Troopa’s head and body, all the parts that are yellow, were actually painted with glossy yellow acrylic paint. I had originally sculpted in yellow already, which was a fine shade, but the drawback was that during molding and baking, a lot of dust speckles got stuck in the clay. Being that it made Koopa look scruffy and dirt-ridden, I decided to just go back and paint over all the yellow with more yellow. It’s a bit rough around the edges, but as a last minute refinement, it was passable.

Again, not my shiniest jewel I’ve ever put out, but I’m satisfied with it. I can confidently say I don’t have the skills to make something remarkable yet, and sculpting clay is a hobby I rarely indulge myself in. I was pleased to see that the intended recipient took to it well though.
3 Comments
darkandchoco/暗いとチョコ
Man nice work, that seems hard to make… XD
Rico Rivera
Can I buy one?
James Pierce
Haha I’m flattered you like my work enough to offer to purchase, but this was a one-off piece and I no longer work with clay. Thanks for checking out the site!