

Fourth Gundam armor straight, here we go. We’ve kept it strictly Universal Century up until now – from the OG RX-78-2 to the Unicorn and skipping back in the timeline a bit to the Nu. But because there are no brakes on the Iron Blooded Orphans hype train, we’re gonna take a slight divergence and go with the Post-Calamity War’s titular mecha.
I’ll note now that the titling does not mean we will be building all six forms of the Barbatos as they appeared in the series. Every year we use some semi-creative (read: not very creative) naming scheme to chronicle our processes and it only seemed fitting to use the “form” pretexts that Barbatos was usually designated with when building a Barbatos armor.

Anime Expo 2016 is just about a month away when we started to get crackin’. Normally we would’ve stayed away from doing a suit with so many round parts and crazy curved surfaces, but there was good reason for us to become so bold this year.

I’ve only heard legends about EVA foam, but it turns out this stuff is easier to get our hands on than we thought. A quick trip to our local Pep Boys Auto store yielded us a large rolled up foam mat for around $20.

This is a very popular material to use for armor apparently, much to the point where we were the minority for using cardboard and duct tape in the past. As such, online tutorials weren’t hard to find and get a general grasp for how to work with this stuff.

It’s bendy, squishy, and fairly easy to cut apart with a sharp blade. One side is of course textured and the other side smooth; this stuff was originally meant to be used as padding for garage floors, but we’re cosplayers so we never use anything for its intended purpose.
 Comrade had already made a good amount of the suit in SketchUp, a 3D modeling program, so it was a fairly simple job to translate it from screen to foam for things like the torso where the measurements were already there.

We usually leave the helmet and face to the very end of the build, but I decided to get started right away with this segment, since it’s kind of one of the most important and defining parts of the suit. It was a sad story when we didn’t actually have one.

Meet our trusty project companion, a cheap Styrofoam head that’s actually a bit too small to work as a head mold for my partner who will be wearing the suit.

A fancy man on YouTube named Evil Ted who’s apparently a foam-master God has a whole bunch of step-by-step video tutorials that made this completely foreign material look easy to work with, so to minimize the chances of anything going horribly wrong, I decided to just follow his How to Make a Foam Helmet tutorial by the book.

We of course needed a model head to start, and while Ted did mention in his video how these Styrofoam heads were usually too small, we decided to run with it anyway because we didn’t have anything better available to us.

The first few steps involve wrapping the entire head in aluminum foil and then wrapping that in duct tape as tightly as possible so we get the specific contours of our head model.

Next was to mark out the shape of our helmet with Sharpie on our duct tape-wrapped head. It’ll be split into four sections, two on each half of the head because foam can’t curve enough to just use one piece.

Took an Exacto to it next and cut along our pre-drawn lines.

Left with only a face and neck. We named our gleeful little helper Ben.

With the templates cut out, they’re to be smoothed out as much as possible so we can trace them onto paper. An incision had to be made on the big round piece that makes up the sides of the head to make it lay flat.
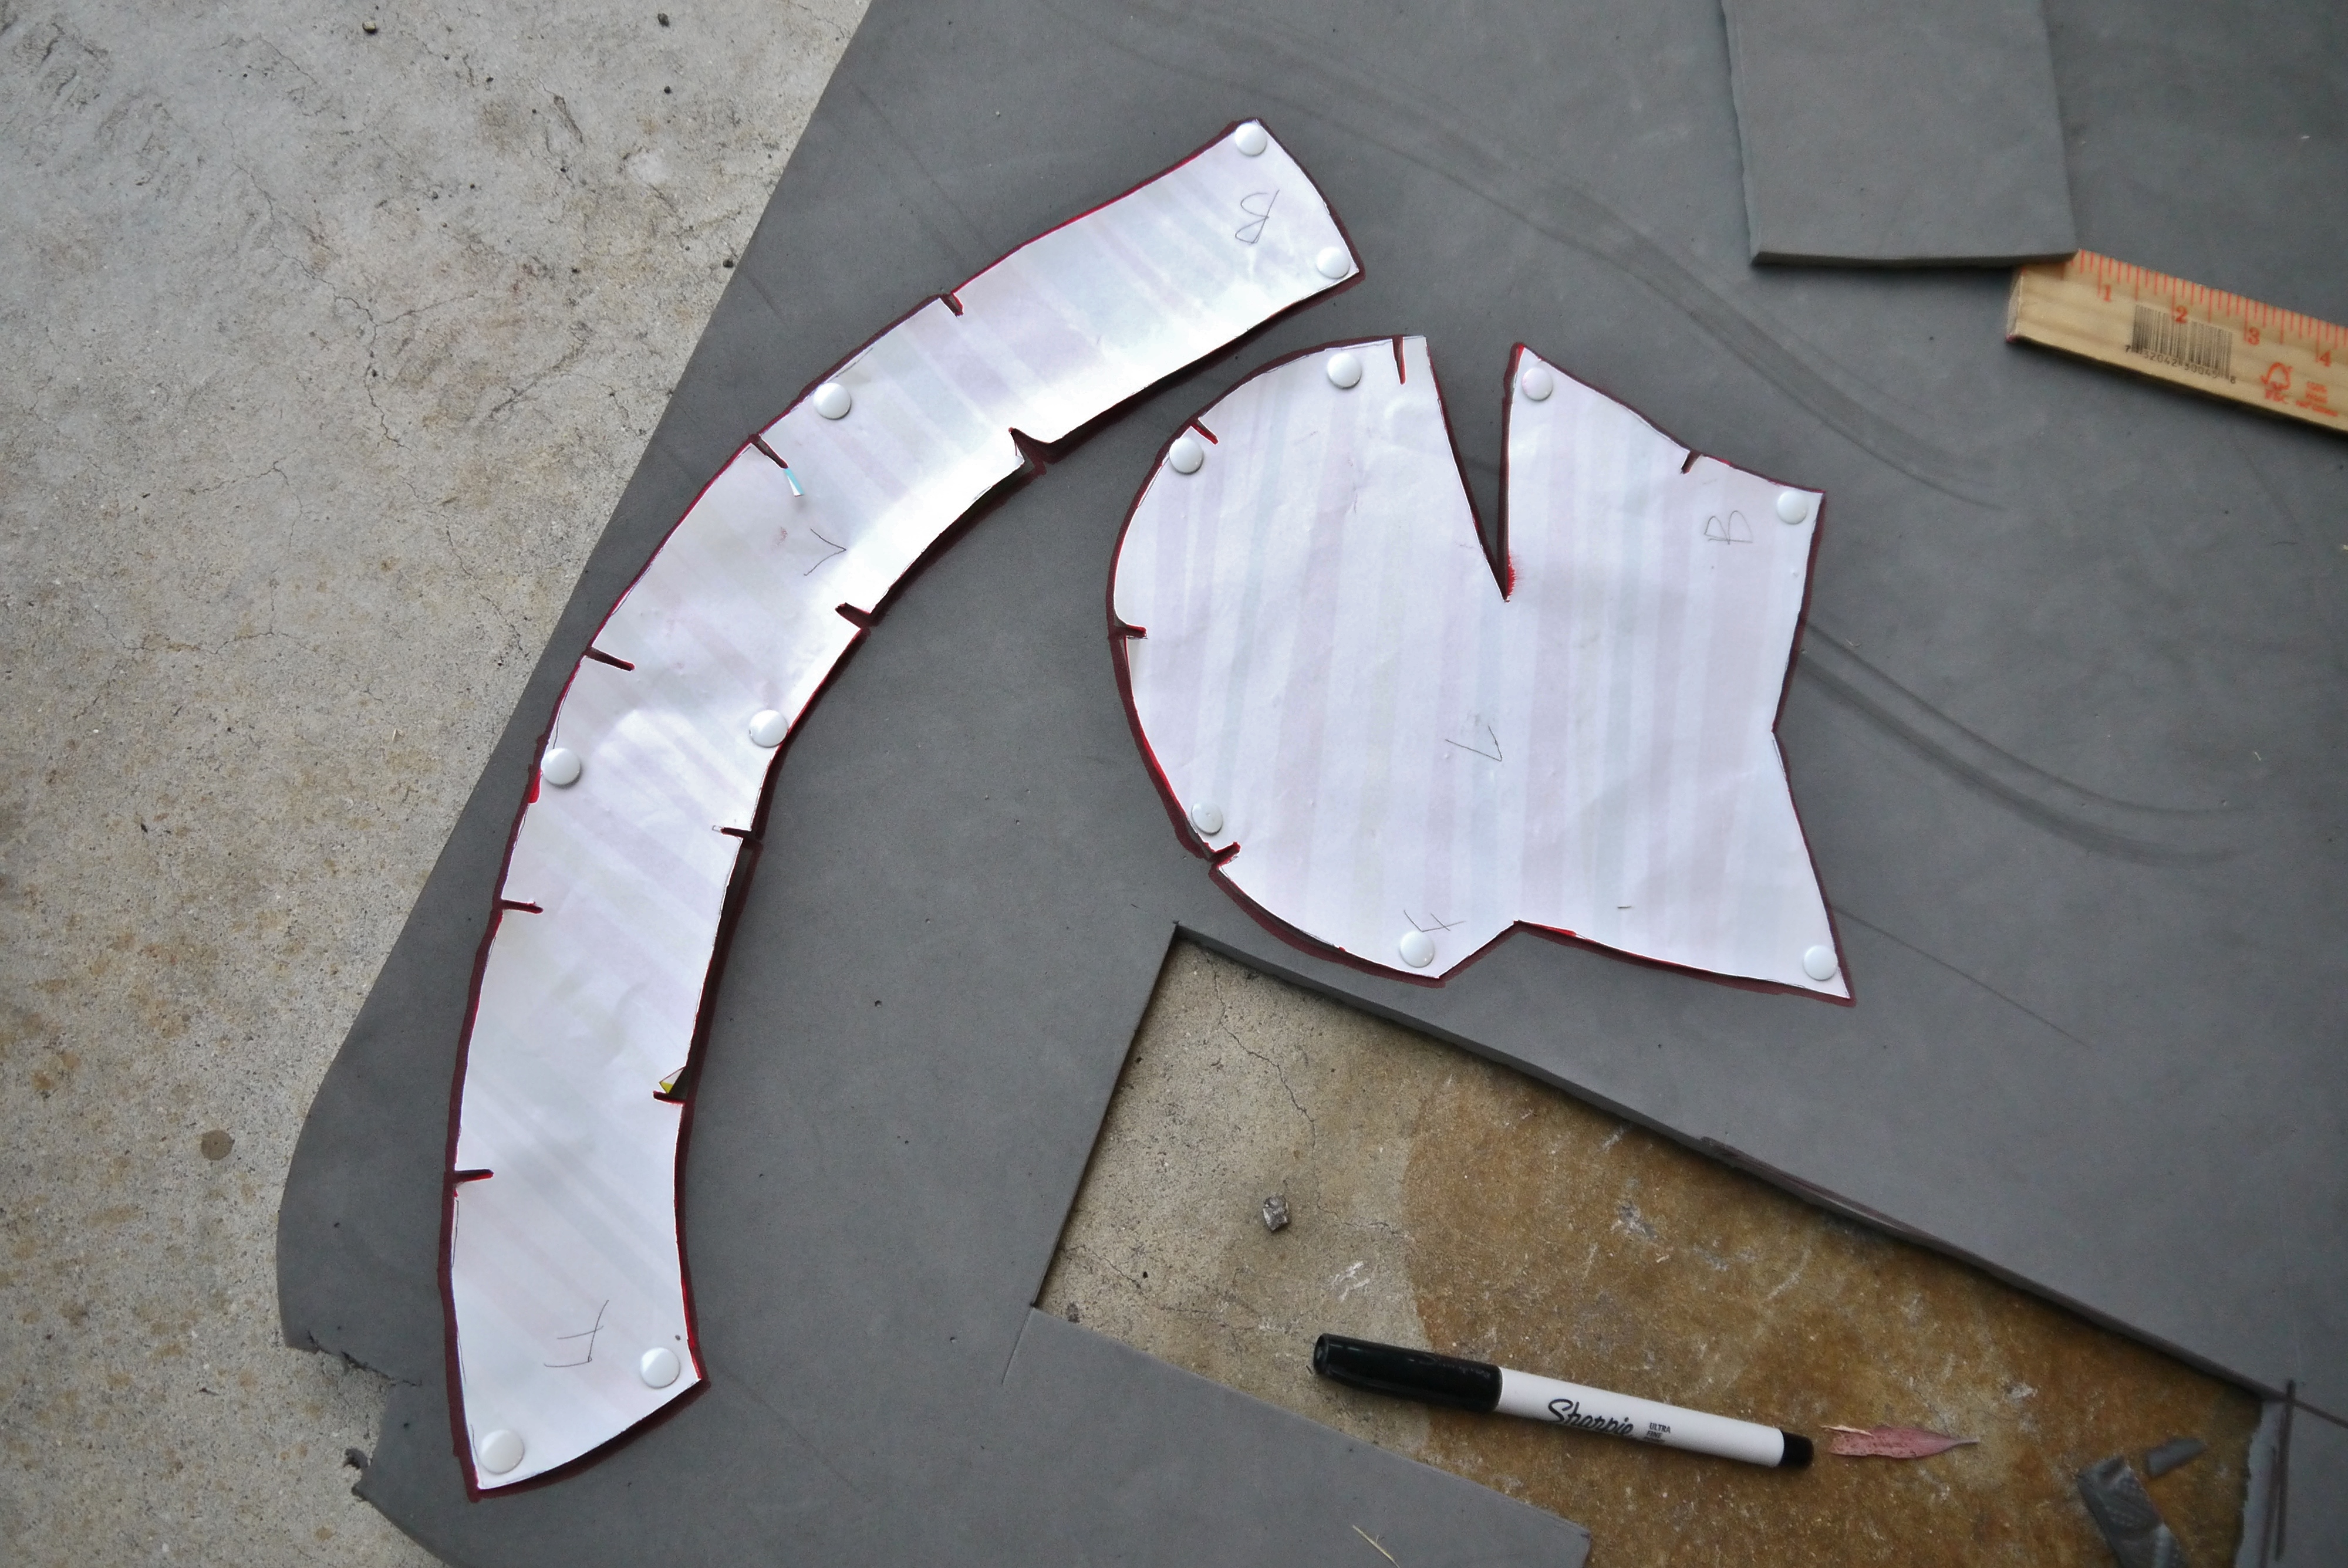
The paper templates are then traced on foam. Those little tick marks are drawn on at the very beginning to make sure everything lines up when you finally glue it all back together.

Cut out the foam and voila, all the parts we need to make a helmet. To ensure both halves of the head are absolutely symmetrical, I only really used one side of the duct tape template that we cut from Ben’s head earlier. That was simply mirrored on the foam to create two identical halves.

A heat gun is kind of essential when forming and working with foam. It’s also needed to heat-seal it prior to priming and painting, so thankfully one of our buddies had one we could borrow for this project at no cost.

Heated the pieces first to bend them into shape a little and started putting them together with hot glue. This isn’t the ideal bonding method for foam, mainly because hot glue is extremely messy and in some cases will dry too quickly and thickly, leaving very bad seams.

Test fit. Just a little too small. The top of his head couldn’t even touch the top of the inside of the helmet because the sides were too narrow.

Fits Ben like a glove, as expected since it was literally made off of his head rather than my partner’s.

But this wouldn’t do; if it’s constantly being squeezed outwards during the entirety of the ‘con I was too worried about it coming apart on my comrade’s head.

The hot glue seams make me cry. I came up with a simple solution to enlarge the head though – all we have to do is make it wider.

Grabbed a spare strip of foam, cut the helmet apart right down the center seam, and shoehorned said piece in. Quick, easy, effective. It’s actually almost too big now, but size matters right?

It’s now super loose on Ben and a bit wobbly on my partner’s crown, but we can always add a little padding inside to secure it perfectly.

The head was so well-documented because it was my personal pet-project – I followed Ted’s tutorial and whipped that together on my own while my partner worked on the torso basically on his own.

His first dab at it ended up going wrong for whatever reason though, so he scrapped it completely after marking it as a Prototype and remade a new one. Now he’s also dissatisfied with his most recent attempt and wants to remake it yet again though (ain’t nobody got time for that).

The forehead crest that links to the v-fin on the Barbatos is just like, what? It’s such an indistinct yellow blob that’s kinda just there, I didn’t even know where to start with it.

Double-layering the v-fin because we can’t have the textured foam showing on the back and it makes it sturdier this way.

It fits! The v-fin will of course have the lines that Barbatos sported scribed into them later, but for now everything seems to be on-point.

Looks proportional? Kinda? (I’ve lowkey made more progress than he has of course).

Because the v-fin was sandwiched together with two textured sides of foam facing each other, there was of course a big nasty seam right down the middle. I decided to attempt remedying this with some good ‘ol Tamiya White Putty glomped into the gaps.
 Had to add some putty to the forehead crest too.

The cheek guards were made pretty arbitrarily – they ended up a little large but I’m particularly proud of the sunken cheek vents – oh the glorious things foam allows us to do.

Drew in and then cut out the Barbatos’ chest power button.
 To achieve the layered look we simply glued the cut-out bits by the edges to the original shape with hot glue. End result looks really cool.

My partner building out the chest.
 That gap in the central codpiece there requires some crazy angling and beveling of foam to fill in correctly, pretty glad I didn’t have to deal with it.
 [Trigger warning]
You scream, eye scream, we all scream for eye scream!

Drawing out the facemask. Pretty basic right?
 But the devil is in the details. I’m so glad we can get actual mouth vents with the foam this year. Cutting slices into the material and then heating it with the heat gun will cause the foam to expand and create those nice deep grooves, which means this armor will actually have panel lines!

Only when I was basically 80% done with the head did we finally go out and grab the proper adhesive for foam-building – contact cement. This stuff is pretty magical – just brush some thin coats onto two pieces of foam, join them, and it’ll create a stronger bond than the foam material itself. It’s also very minimal with seams if done correctly, much better than the hot glue.
 Spotted a useless party member who came just for the shits ‘n giggles.

Torso and head now basically done; it looks small because Barbatos literally has half a torso – the stomach area is all exposed on the actual suit so thankfully there’s just straight-up less to build.
We’ve been building back-to-back so far though, so next up will probably be the shoulders and arm as we flesh out the upper body and work our way down.
Read on the rest of the build:
