After completing an SW20 and an AW11 over a year ago, we’re finally here – saving the best MR2 for last (nope, no bias here).
I built my own Lotus Evora out of a Bburago model a few months ago – this time this Fujimi MR-S will be modeled after my second car, a 2004 Toyota MR2 Spyder.
Unlike my Evora that’s still fairly stock, I’ve had my MR-S for the better part of 3 years already, meaning it’s had plenty of time to get built with a lot of things touched.
I happened to get really lucky finding Fujimi’s Fun Sports Package version of their MR-S model at my local hobby shop a few years ago. After doing some research it looks like this particular variant is extremely hard to come by, but it was exactly what I needed since this is the only variant as far as I’m aware that includes the TRD Stage 2 front bumper.
The MR-S was marketed in Japan with different dealer package levels, which brought in optional body parts and different color trim options. The most common version of the Fujimi MR-S models I see for sale are of the Elegant Sports Package, which just adds a TRD front lip to the prefacelift bumper rather than a complete replacement bumper.
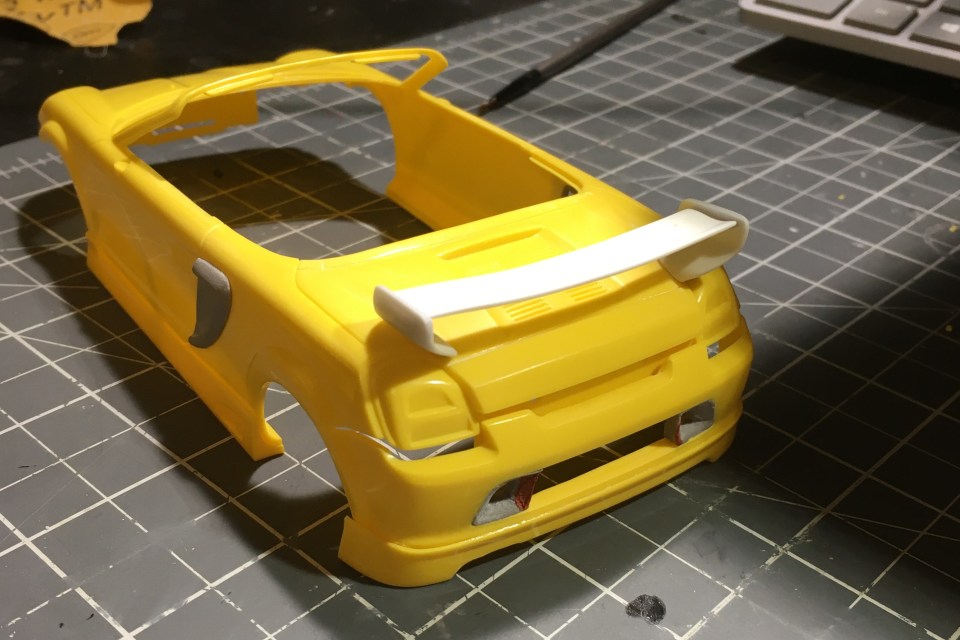
The whole body comes in a pale yellow plastic, along with most body add-on parts. It’s still a Fujimi kit, which means parts count and overall complexity isn’t going to be very high. We can see this with how the headlights and taillights are just molded into the main body shell.
I’m sure the Fun Sports Package translates to this single extra parts runner in model kit form. We get the TRD Stage 2 front bumper, factory option low profile wing, and TRD side and rear skirts.
Hardtop included! But I will die on my hill that you should buy convertibles to drive convertibles. My top is never up unless the car is parked overnight (yes I drive topless through rain, and you should too).
Fujimi’s decal sheet is very sparse – but at least they give you the choice of two different gauge faces. I picked up an extra metal sticker sheet from ZoomOn models for the MR-S badging that’ll be used on the rear bumper later.
Starting by doing some trimming on the front and rear bumpers.
Fujimi gives you half the front bumper vents molded in on each corner, expecting you to fill in the middle portions besides the license plate bracket with actual mesh. They do this because the mounts for the front foglights needed to be molded into plastic. We’re obviously not going to settle for anything less than full mesh, foglight mounts or not, so those are being cut out.
The rear bumper has the upper vent molded in plastic along with what is actually a plastic trim insert on the real car all molded into the rear bumper as one piece. Both are cut out. My facelift car uses a different style of rear bumper insert in the middle anyway.
I began regretting all the aftermarket parts on my car immediately as I started this build. I figured I’d tackle one of the hardest parts first – my Varis-style side intake vents made by CL Performance. No aftermarket parts supplier makes these in 1/24 obviously, so I was on my own to try to recreate them.
I haven’t worked with clay in actual ages – maybe even a decade. I had some old Super Sculpty lying around and figured my best shot at this would be to attempt to sculpt it out of a chunk of clay by hand.
After cutting out the factory side vent from the body shell, I pressed a clay block into the opening to get a reverse mold that I could cut the general shape out of.
The vent shape is cut out of the block and pressed back on to the body.
I then start carving out the indent with a hobby knife, smoothing the outer edges down with my fingers as the clay is still soft. This stuff doesn’t harden until you fire it in an oven anyway, so I wasn’t worried about working time.
Yup, looks like a vent to me.
Had to do it all over again the exact same way for the other side and just hoped that the process would get me something similar.
Next on the to-do list was the rear wing, which is a C-ONEX replica fiberglass wing made by LuxuryPart. The shape of the stands as they curve in to meet the trunk lid was way too complex for me to craft out of clay this time, so I began looking around for more creative ways to make this work.
An unlikely inspiration – aftermarket model maker C1 Models actually sells a Slant Nose Porsche 996 conversion kit for a Tamiya 911 GT3.
The conversion kit included a new 996 engine lid with a wing molded in. I was prepared to buy the entire conversion kit just to pillage the trunk lid piece, but Chris over at C1 was gracious enough to sell me just a copy of the piece I needed, so I didn’t end up wasting the rest of a kit I wouldn’t use.
What do you mean it doesn’t fit on my Toyota?!
All I needed from this part were the wing stand edges, which look mildly similar enough to my C-ONEX wing stands. The 996 trunk lid is cut and tossed.
The original wing deck from the 996 kit was obviously much too wide and short for my application, so I had to create my own custom wing deck. This proved a lot more difficult than I expected, since the deck is actually curved rather than straight.
The white wing deck piece I think is actually the wing deck pulled from an unused wing on my Integra DC5 kit. It was originally just a straight piece of plastic, but I ended up taking a heat gun to it in an attempt to curve it.
The overall look is there, but the heating and bending ended up warping the plastic to the point where the deck surface was now wavy and uneven. Will have to fill in the entire top with body filler later to smooth it out.
Looking at wheels – the TE37V on my car are actually double staggered – 15×7.5 in the front and 16×8 in the rear. Thankfully Fugu Garage actually carries TE37V in 16″, so my rears were covered. The Toyo tires are also from Fugu Garage (they say 17″ but a little filler on the barrels gets them to fit on the 16″ wheels just fine).
The fronts were a little trickier – I had a hard time finding aftermarket producers that made TE37V in 15″. Then one day out of the blue at a model car show I got lucky – a vendor happened to be selling these aftermarket wheel sets that perfectly fit the bill.
Nowhere do they say they’re actually TE37V, but they’re dished 6 spoke wheels advertised as 15″, so the shoe fits. I’ve never heard of this aftermarket brand before – “Orange Wheels” – or Asuka Model, so I thought I got super lucky to find them just by chance.
Mocked up with wheels and body work so far. Starting to look familiar.
Next up were the headlights and taillights. This Fujimi model is based off a pre-facelift car (model years 2000-2002), which means it has old style headlights, taillights, side vents, and bumper trim.
My 2004 facelift car came with projector headlights, which are technically completely new units compared to the older lights, but I think I could replicate the general look of the new model units by modifying the pre-facelift lights.
My brilliant idea was to just cut a corner out of the original headlight housings and insert a styrene tube into each corner to mimic the look of the projectors.
Hopefully the last bit of clay I’ll have to use on this kit – a small mound to go over the factory mirror mounting points to create the look of the bases of my APR GTC mirrors.
Body check with primer.
Took many layers of smoothing with Bondo to get the damn wing deck mildly less wavy.
Body was sprayed with Tamiya TS-42 Light Gunmetal, likely the closest hobby paint match to my factory Toyota Phantom Gray Pearl.
Finally moving onto the interior. Unfortunately there was simply no way around the model being RHD. Fujimi never made LHD versions of this kit, so this is all we’re gonna get, and I’m definitely not skilled enough to perform a RHD to LHD conversion seamlessly.
These are also technically pre-facelift seats (my facelift seats are the same general shape, but the headrest area has a cut-out instead of being solid), but I didn’t find the difference major enough to warrant attempting to modify them.
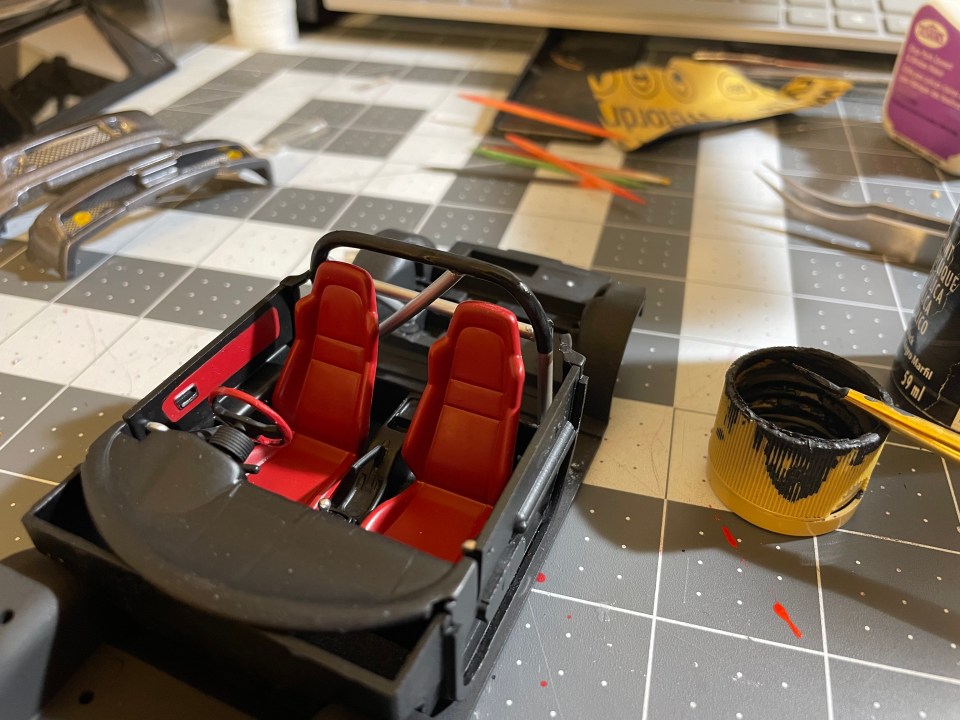
Seats and softtop cover painted red. The seats will be finished in semi-gloss to mimic the look of the real leather, while the soft top cover will be sprayed with flat topcoat to imitate the look of the fabric cloth top.
My car is running a Hard Dog roll bar, specifically made for the MR-S platform, which has been powdercoated silver and uses Hard Dog’s roll bar padding and leather cover.
True to the real car, the rear seat storage cubbies have to be deleted to fit the roll bar. Fujimi simply molded the cubby doors into the main interior tub as the rear, so it was a simple matter to cut a flap out.
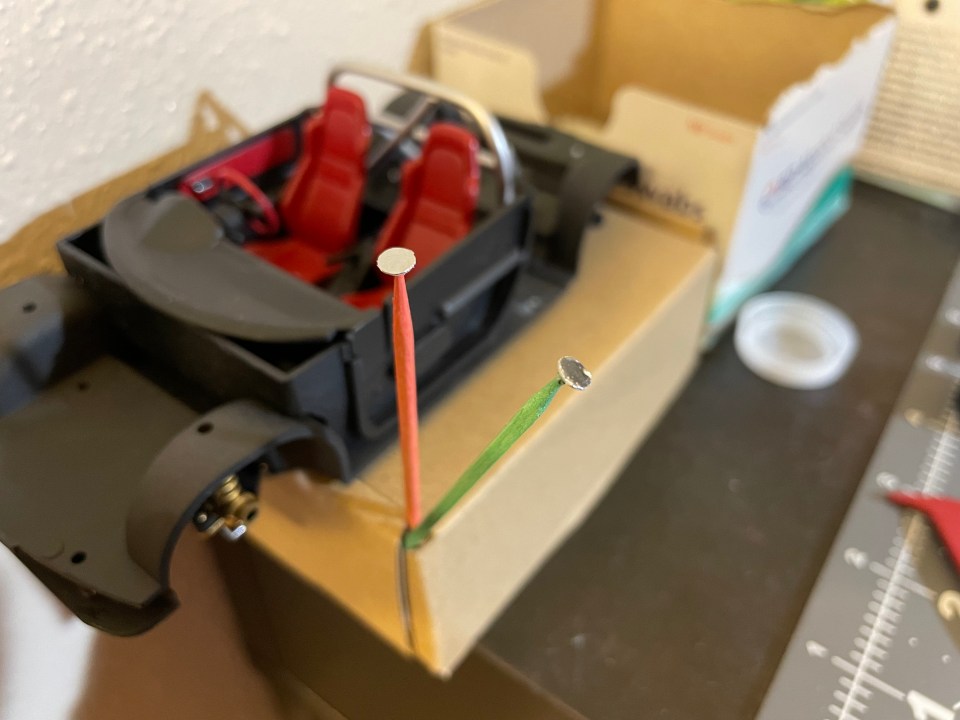
Thankfully my roll bar isn’t particularly complicated – a single diagonal with two rear support bars and another horizontal bar between them is all there is to it. Scratch built out of styrene tubes.
The tricky part was lining up the bar so it didn’t clear the windshield screen but still sat above the seats. There’s a narrow area that the roll bar occupies that I wanted to get right.
Added a piece of plastic at the bottom for support and painted the whole thing silver.
Sourced some aftermarket resin parts from ZoomOn Models to add some miscellaneous details, like the steering wheel and side view mirrors.
I’m running a Nardi Personal New Racing 320mm wheel in my car. It’s a bit of a weird niche wheel, so I didn’t expect any model maker to carry it – I just resorted to using something similar.
In this case a Honda Spoon Sports steering wheel, mated with one of ZoomOn’s aftermarket steering wheel adapters, which would mimic the look of my real Works Bell standard adapter.
ZoomOn actually has several aftermarket side mirror options available, and while none were an exact match for my APR GTC mirrors, the universal racing side mirrors came the closest. They even came with metal dry transfer decals for the actual mirror lenses.
Sanded the outer housings down slightly to make them rounder and more in line with the look of the APR’s, then poked some tiny holes in the bottom of the housings to stick some stiff metal beading wire through to make the mirror stands.
These mirrors are the only part on my car that are carbon fiber. It took many tries to wrap them with carbon fiber water slide decals.
Interior test-fit with the roll bar and soft top cover. Clearances are tight, but it all works.
I pretty much haven’t talked at all about any of the suspension or drivetrain components, since this is a Fujimi model – they’re almost nonexistent. The front at least gets strut detail and a turning axle, while the rear would’ve just been a solid metal beam that Fujimi provides.
A few pieces are given to represent the bottom of the motor assembly, like the exhaust muffler, oil pan, and transmission casing, but there’s no detail beyond any of that. I just painted it all silver and called it a day, we won’t be seeing any of that once the model is done anyway.
Fujimi includes some pretty large scale mesh in the box that they expect you to use with the front bumper openings, but after trying it out I thought it looked way too large. It works for the rear bumper since the “mesh” on the rear bumper in facelift cars is actually hard plastic trim made to look like vents, but the front bumper is actually mesh grille.
Switched to some smaller mesh I had lying around. Much better.
I was actually in a bit of a bind trying to figure out how I was going to replicate the facelift taillights, since they’re uniquely difficult in that the lenses are still clear red, but they sport two clear circles near the top for the turn signals and reverse lights.
It’s rather hard to paint clean circles in the clear red of the lenses, even with masking tape, so I figured the next best thing I could do was paint the whole thing red and glue some cut pieces of small styrene pipe into the housings, right up against the lenses. They wouldn’t be a vibrant clear as they should be on the real car, but at least the detail of the lights would be there past the lenses.
Next challenge was the fog lights in the front bumper. Remember I cut out the housings from the original bumper since Fujimi had them molded in hard plastic and replaced the whole area with just mesh. My solution to put them back in now is to cut these thin pieces of circular plastic, paint them chrome, and glue them to the bumper mesh as the new fog light “housings.”
The tiny clear foglight lenses themselves are then painted clear yellow and glued on top of those thing circular pieces.
I struggled for a bit wondering how I was going to recreate the look of the leather wrapped on top of my roll bar with the roll bar padding, thinking maybe I could cut some super thin fabric and actually wrap it or something crazy like that. In the end I said to hell with it, let’s just paint the section in flat black.
Replacing the tiny stock exhaust tip with a bigger boi to represent the HKS unit I have on mine.
I had these little stick-on craft jewels left over from when I used them to create the headlights on my Revell Mitsubishi Eclipse. I’m now using them to stick into the tubes I used in the headlights to create “projectors.”
Finally finishing up with the wheels. Rather nice that the Orange Wheels have the outer lips separate from the faces, making painting a breeze. Not so much for the Fugu Garage wheels.
My lugnuts are neochrome Project Kics units, so an attempt was made here to recreate that look with Testors’ Galaxy Blue colorshift paint. Results are questionable at best.
And done! Did I get close?
I realize now that I totally forgot to mention that the rear bumper trim was also molded out of clay, which is why it looks so uneven and messy here even after paint. Those bits around the license plate are unique to the facelift model cars, which is why this early model didn’t have them out of the box.
That bumper gap on the passenger side is a feature, not a bug. On my real car the gap is on the right side. I’m dedicated to accuracy, dammit.
My custom vanity plate was custom printed as a self-made waterslide decal, but the quality doesn’t look that great up close.
The fitment of the headlight lenses were not so good. They actually made the lenses way longer than the actual housings at the bottom, so it really attaches more to the front bumper than it does to the edge of the headlights.
Fujimi’s mold with this kit is very obviously also strangely off-kilter. The proportions of the front bumper especially seem weirdly squished, all the way up to the headlights not appearing as long as they should. I guess maybe these are details you’d only notice as an actual MR-S owner, but it’s unfortunate I can’t do much about mold proportion problems like that.
The rear TRD skirt also looks strangely flared on Fujimi’s rendition compared to the real car. Strange considering they got the side skirts down pretty well.
Very sad about the car staying RHD.


