It hits us a little harder and we go a little crazier every time someone mentions, “Anime Expo is at the end of this week!” It’s rather ironic then, that we laugh it off when people ask how many months it took us to build the suit. Three weeks is a rush, but I can’t imagine how unbelievably stagnant and drawn-out it would be to work on a project like this on and off over the course of half a year.
The final boss build-wise would be Quanta’s gigantic shoulder-mounted shield. Our plan was to have a PVC pipe frame inside as support, which will be run all the way to the PVC frame in the backpack unit.
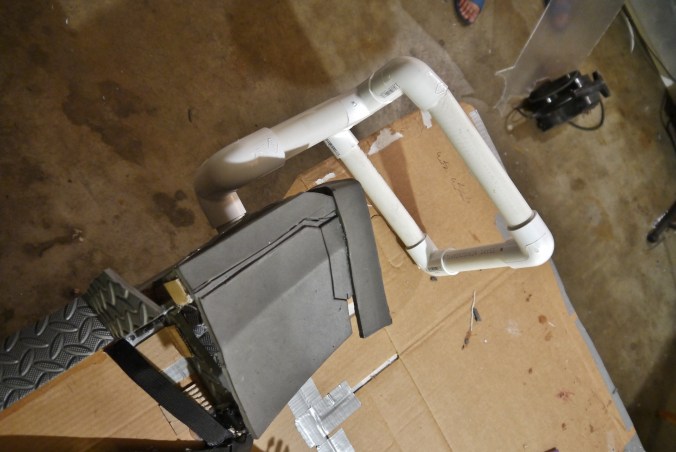
Partner is basically single-handedly responsible for this thing’s entire construction. Starting with a cardboard base piece.
We were lucky enough just to have a leftover tower fan box that we could use as a mockup for the shield; without one he would’ve had to Frankenstein together multiple smaller cardboard boxes like a savage.
Shield bits also mocked up out of cardboard.
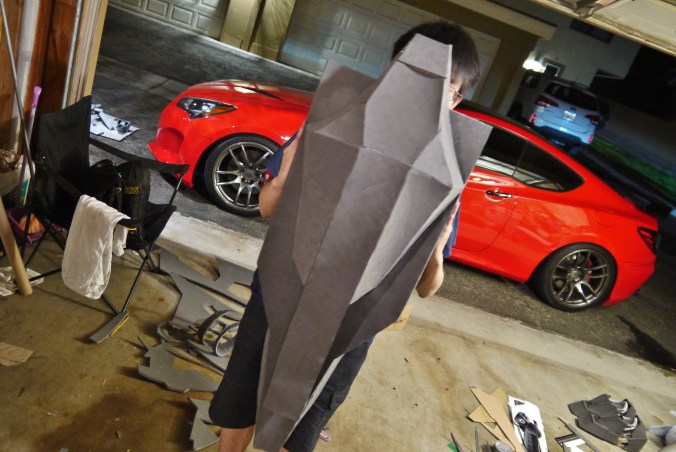
It’s looking like something. I don’t envy his position, with the shield’s ludicrous amounts of subtle body lines and curves.
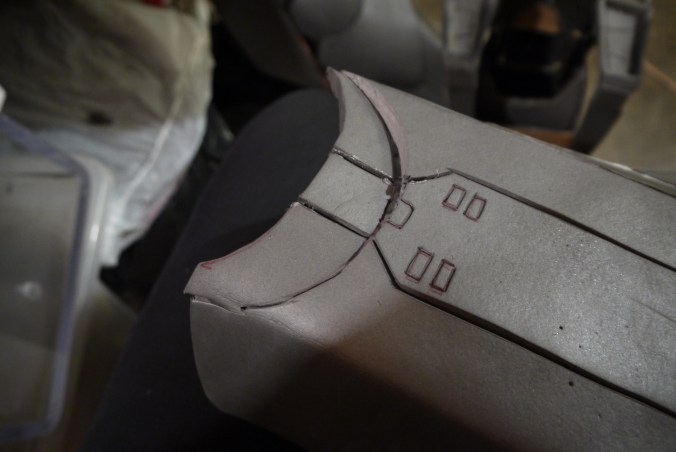
Transferring the cardboard onto foam.
We had to crack open a new roll just for the shield’s insane amount of sheer surface area.
Ironically this little quirk really peeved my partner – the foam was freshly unrolled, so once he cut the main body outline out of it, it wouldn’t stop rolling up on itself. Should’ve let it sit overnight with some weights on the edges.
The look of a defeated man who can’t even get his pieces on straight because he’s working with a self-rolling burrito instead of foam.
When he gets annoyed enough to actually hot glue temporary cardboard straightener boards into the back. It only helped marginally; the edges still flare out like no tomorrow.
Meanwhile I need to get everything else strapped up and ready for wear.
When we first started building cosplay we would attempt to keep the lower legs in place via elastic and whatever things that could hug the wearer’s legs. In more recent years we’ve become enlightened, and now use buckles to suspend the lower legs from the thighs. This method both eliminates the problem of the lower legs rotating and becoming out of alignment and prevents it from sagging downwards.
The thighs in turn will be suspended from the belt, so in a sense everything from the waist down sans the shoes will be held up at the waist. We had quite a bit of spare velcro just lying around, so I decided to make use of that for the thigh suspenders.
Annoyingly, these velcro strips used to be around 2 inches wide or so. I cut them in half to one inch strips so I could make use of them more efficiently, but that ended up causing the velcro to split from the straps it was sown onto. Thankfully hot glue provided a quick and (hopefully) reliable fix.
Unfortunately after I finished the legs I didn’t have enough nice buckles left for the skirt attachments. This means we’re back to the ‘ol cheap, small, and painful to remove Home Depot buckles.
Straps that will connect the skirts to the wearer’s belt.
Glued into all the skirts individually.
Test fit with the skirts in place. Everything looks like it sits prim and proper, but the rear skirt is unnaturally long, to the point that I’m getting Barbatos Lupus Rex tail vibes. It’ll be cut down.
The belt was then marked so I would know where to glue the straps from the skirts.
The hot glue didn’t take to the rubber of the belt very well, but for parts that were peeling up I added a helping glop of epoxy, which will hopefully actually make it indestructible.
The belt on the right is the one we’ve used for the past 4 years; it’s seen many buckles and many forms of attachment, but it’s finally being retired and replaced by the one we’re using now, which was actually a surprise find at the dollar store. Back then we couldn’t afford actual straps, which is why it’s covered in tattered gray fabric.
Needless to say the belt won’t be removable from these pants without cutting some straps or buckles, but that’s okay. The long strips are the velcro bits for suspending the thighs.
All of these strap and buckle connections are held together by E6000 industrial adhesive and hot glue welds. This is done because these straps will almost always be under stress while being worn, so if they fail it’s game over.
However, when I messed up on a few and had to take them apart to re-position them, I found that they hold a little too well – the foam itself was tearing up before the glue would let go. On one hand it’s reassuring to know that my adhesion technique that’s meant to be indestructible is actually near-indestructible, but on another hand it presents a headache when I actually need to remove them.
We started with 50 glue sticks – the last four survivors await execution fearfully.
Testing the leg fitment with the straps in. It’s actually causing some serious problems with movement – to simplify the issue, the pieces were built for a longer leg than what my partner’s body has to offer. The pieces would fit perfectly if the thigh could ride higher and the lower leg could ride lower, giving a more generous gap where the knee is supposed to be.
A minor fix to this problem is to cut a larger chunk out of the inner thigh so it can go deeper into the wearer’s pelvis area.
The long protrusion piece coming off the thigh is supposed to be inside that trapezoid cut on the kneecap. Obviously it’s not even close; to achieve that we’d have to have them spread farther apart, and that’s just not happening without performing knee surgery on my partner to extend his legs.
We’re also getting collision with the rear lower leg armor and the bottom of the thigh.
A partial remedy is to make those pieces on the rear of the lower leg smaller, which will also prevent it from flaring out too wide, as it looked weird earlier coming out horizontally too far.
The new piece is much smaller and more subtle, which works with the rest of the leg.
The second step would be to trim down the bottom of the thighs. We didn’t want to lose the little protrusion in the armor at the bottom completely, so I removed just enough material to let the lower legs sit in that area without bumping into it.
The updated result. There’s nearly no more collision; it’s mostly not there or minimized at this point. The thighs are now even more inaccurate to the model kit than they had been before, but compromises are inevitable when we’re trying to fit this stuff onto a human body.
Elastic bands were then also added to the bottom rear of the thighs to keep those tabs at the edges from colliding with the lower legs when the wearer bent his knee. It feels almost ridiculous to go to such lengths to adjust these designs to fit.
We also lowered the lower legs a bit to create more of a gap between it and the thigh, but this ended up creating the problem of collision at the lower ankles with the feet armor. When we change one thing it’s a chain reaction of problems that have to be solved. Thankfully this one was easily mitigated by just cutting a bit of material off the lower rear ankle armor, which then allowed for enough articulation clearance when my partner moved around.
Disaster strikes again. We’ve spilled maybe half a can of contact cement at this point in the project; it happens way too often.
Cardboard brackets to hold in those ridiculously long pieces that refuse to stay straight.
Respect to his ambition of building a lot of the shield pieces without multiple pieces or seams; there seems to be more of a bend-as-many-as-I-can philosophy going on here rather than making multiple pieces and joining them to create a bend.
A lot of the main shape is nearly done being ironed out.
It looks like it comes out and bulges quite a bit, but hopefully that’ll be mitigated once all the other pieces are in?
And of course, with most of the building and strapping done, it’s finally time to get some color on. In our traditional cheapskate fashion, these are extra value rattle cans from our local WalMart. I almost felt bad for the employee helping me get them as he tried to juggle all of them in his arms.
Foam is slightly porous even after being heat-sealed, so to “prime” it and achieve a smooth painting surface we hit everything with a generous coat of PlastiDip first.
Takes a while to build it up.
We usually skimp pretty hard on the Plasti Dip coat; oftentimes we have so much armor and so little dip that we just end up misting the whole suit.
We’re trying to make less compromises and go harder on the base coat so we won’t have to work as hard to build the color up later though.
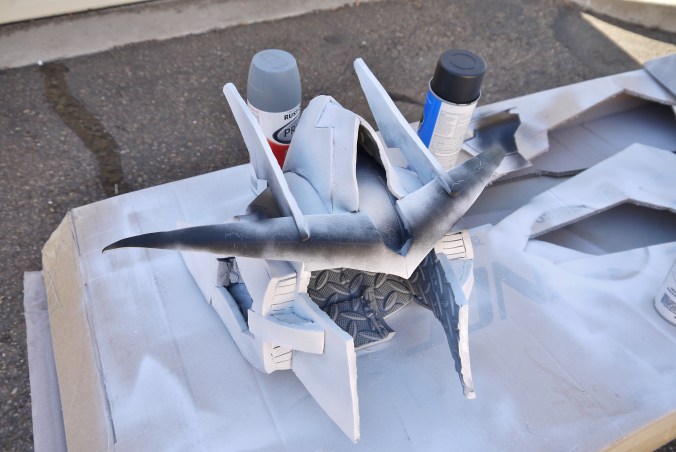
Slowly filling in the gaps in the shield.
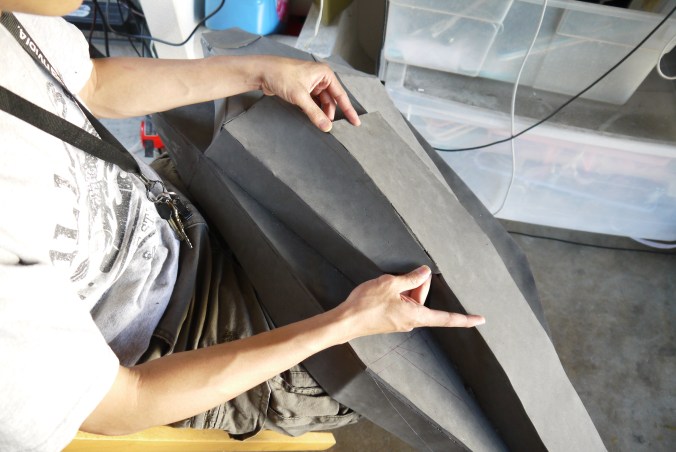
And now mostly done. It actually looks really good and actually shield-like with the top area in.
My partner was super concerned about the shield being too long or too short; with a dry fit it looks like it”s just the right size. It’s supposed to end at around the Quanta’s knee when mounted up at an angle.
Shield bit pieces also made, though now they all have to be cloned since there’s a top and bottom.
All the bit pieces cloned and cut.
Making a quick collar piece to fill out more of the area below the head.
Getting around to the final fitment of the chest orb; we can’t glue anything in place until after the parts are painted, which is rather frustrating given we’re really never gonna see what the complete torso will look like until the very end.
With the shield body and sword bit holders done, it was time to actually tackle the clear acrylic and make the blades themselves.
He initially started just designing the bits on the acrylic sheet, but quickly aborted and decided that marking them out as cardboard templates would be a much more efficient work style.
First shield blade template cut. Thankfully we had a super thick and double corrugated cardboard box lying around for this use, making the template sturdy and rigid.
I can see it. This whole assembly is actually two separate bits, rather than one long blade.
Screwed up on one of them. The shape isn’t quite right.
All the templates cut out and ready to be traced onto the acrylic. We were honestly suffering from a lot of material limit anxiety, as we were constantly fretting over whether our remaining acrylic sheet would be enough to fit all the bits onto.
The madman going in on those long straight lines with a measly dremel saw. Thankfully he’s honed his skills enough that he actually gets it all cut out in record time.
A bit hard to tell since the piece is clear, but it’s laid over the cardboard template perfectly and will fit with the foam blade holder well.
The last clear blade would be for the actual GN Sword itself. We only had so much acrylic left, and I was worried for a while that it wouldn’t be long enough, but we decided to just cut it out at its current length and see how it looks once put together. If it’s too short we can hopefully extend it.
As clean as most of the cuts are with the dremel, some rough edges still needed to be smoothed out. The acrylic blade points are also quite sharp; we don’t want these actually gouging any eyes out at the Expo, despite our constant desire to look intimidating as a giant robot.
So I took the dremel with the sanding drum to all the blades and made them OSHA-compliant. They could probably still be used to stab things if you tried hard enough, but at the very least the tips no longer prick your fingers. Hopefully this earns us brownie points with the peace bond corps at the Expo.
Masking the buckles and straps off before sending these pieces off to paint because we don’t want to repaint them black later.
Coats and coats of dip. At least it’s white so it’ll be easy to lay the actual white color paint over.
Krylon now offers extra large 25% more cans for nearly all their paints for the same price as before – a blessing for us when we need all the paint we can get.
Parts like the skirts are easy because they’re actually all white, so once this is done that’s that. Other parts like the legs and torso that are multiple colors will require some serious masking work in the near future.
And we’ve run into problems. We had this issue last year, but it feels like it’s much more prominent this time. The red sharpie we used to mark the foam while we were building is showing through three layers of PlastiDip and two layers of white paint. Even white primer isn’t getting rid of it.
We actually found that spraying the affected areas with a coat of flat black and then going over that with white primer and then white paint got rid of the marks for good. Unfortunately I was rash and sprayed way too thick a coat of white on the v-fin, which ended up cracking and creating an ugly texture.
In my desperation I took the dremel sanding drum to it to hopefully remedy the issue, but after hitting it with a coat of Plasti Dip the uneven surface just looked worse.
My partner suggested using some pla-plate to make a cover for the v-fin, which would both stiffen it up and offer a smooth surface.
Though in my despair I decided to say screw it and cut the old fin off completely and remake it from scratch. It ended up being a simple but demoralizing process – all this work because we used Sharpies to mark the foam when we started building.
All the shield bits are now cut out; the shield will gain some serious width once everything’s mounted.
My partner’s not quite satisfied with how far up the shield bulges, so it looks like he’ll be making some incisions and bringing the curve down.
It’s a little jank especially with the amount of Kwik Seal needed to fill in some gaps deeper and wider than the Grand Canyon, but with a little more touch up it should look just fine with paint.
Cutting up the pipe needed to construct the shield frame. We originally wanted to have pipes going out from the main shield body that would hold up the shield bits, but found that it added too much weight and the bits wouldn’t really need that much support – they could afford to be just glued in.
As a result our new frame is now super simple – just a rectangle for the foam to glue to.
Connected over the left shoulder like so. Three 90 degree pipe fittings bend the pipe frame from the backpack to out the shoulder. We needed to make the entire assembly removable though, so we decided to use a pipe-in-pipe and pin system just as we did with the Barbatos’ shoulders last year.
The shield frame is made up of one inch PVC pipes; the frame in the backpack that leads over the shoulder is an inch and a quarter. The smaller one inch pipe in the shield slots easily into the larger pipe coming out from the shoulder, and a pin (in our case a nail) through both pips up top holds the assembly together, while also making for easy removal.
Our first actual test fit of the rear torso with the shield frame caused some problems – looks like the pipe assembly was so heavy it started weighing the armor in one direction, and even my partner’s body roll couldn’t compensate for the warped look. We were incredibly perplexed, as we’re pretty sure we ran an even bigger assembly over the shoulder with the Nu Gundam, but didn’t have this problem then.
We took the back plate off, toyed around with some solutions that involved counterweights, and finally put the whole thing back on…and it isn’t warping anymore?! Before the entire left side of the torso and shoulder were drooping hardcore, but now it’s even enough that it’ll be negligible once the rest of the armor is on. We weren’t about the question the witchcraft; just accept it and move on with the build.
Building out the backplate for the shield. We can’t put this on until the PVC pipe frame is cemented and inserted; this big chunk of foam will then cover everything up on the underside.
Some sword bit parts built out.
I goofed when we were painting the white – we went hard and used plenty of white paint on the lower half of the shoes and some of the legs and arms, then realized that those parts need to be red and blue later, so it was wasted white paint.
Paint drips happen, and when it does it’s usually a simple matter to sand them down and redo the area with some white primer followed by gloss white paint.
Ben has found a new purpose – holding the helmet up while it’s drying from paint.
These white pieces also look white. Like much more so than previous years. We’re usually much stingier with paint than this, so the colors aren’t quite as vibrant, but this time we’ve gone balls deep and it’s too late to pull out.
Throwing in some of the painted clear green pieces just to see if it’ll look good with color – and sure enough it does.
Can we also talk about that fresh new v-fin? Not only a glorious clean white compared to its earlier dilapidated state, but also much straighter and less bendy than before its revival.
I was nervous from the start to work on getting the eyes fitted, since there’s so little room between the facemask and the wearer’s face, and to compound the problem the Quanta inherently looks like it has a hyper-sunken face.
These eyes were mostly YOLO cut; I glued a piece of thin foam to the back of the facemask and shoved it into my partner’s face while he was wearing the helmet. I then drew out some arbitrary eye designs that may or may not look good once cut out, and proceeded to cut them out.
His eyes are lower than they’ve ever been (they usually line up pretty perfectly with the eye holes) but it’s visible?
This is about as far out as I want the faceplate to go – ideally it would be sunken way further in, but that’s just not possible without extending the helmet considerably or bashing my partner’s nose in.
I super wanted to do a quick mockup just to see how the eyes would look if they were green, so we heat-bent some spare acrylic into the curve of the facemask and laid some spare green mesh around the area of the eyeholes.
This mesh was actually bought early on and is intended for the express purpose of lighting the eyes up, which will most likely be the absolute last thing we do on the suit. Whether that endeavor actually comes through is another matter; we’ve talked about and tried to do lighting on our suits before but it’s never worked out. This time we have a bit of a plan, but still saved it as a bit of an afterthought that we can tackle if we have enough time at the end of the build, which is rapidly approaching.
Read on the rest of the build:


