Not a kit I had originally planned to rebuild, but after surveying my current collection, Brian’s iconic Eclipse stood out as being a little below par with what I’m building today. As a bonus, I had just happened to come across this kit again at my local hobby shop for dirt cheap, so I figured it wouldn’t hurt to have another crack at it.
My original build for this kit was pretty much a straight out-of-box build, deviating very little from what was outlined in the instruction manual and boxart. I think I recall very deliberately trying to match my model as close as possible to the sample kit shown on the box too.
For this rebuild I wanted to put a spin on things – keep the very recognizable look of the movie-famous DSM, but make it my own.
That being said, Revell does give you like 3 different options for front and rear bumpers with this kit, but everything except the original movie-car kit reeked a little too much of early 2000’s overstyling, so I opted to keep with the original parts. The one option part I did decide to use was the hood with the intake scoop.
I forgot I had to cut the side vent holes out of this bumper; Revell gives it to you with the mesh pattern molded in solid. What a pain.
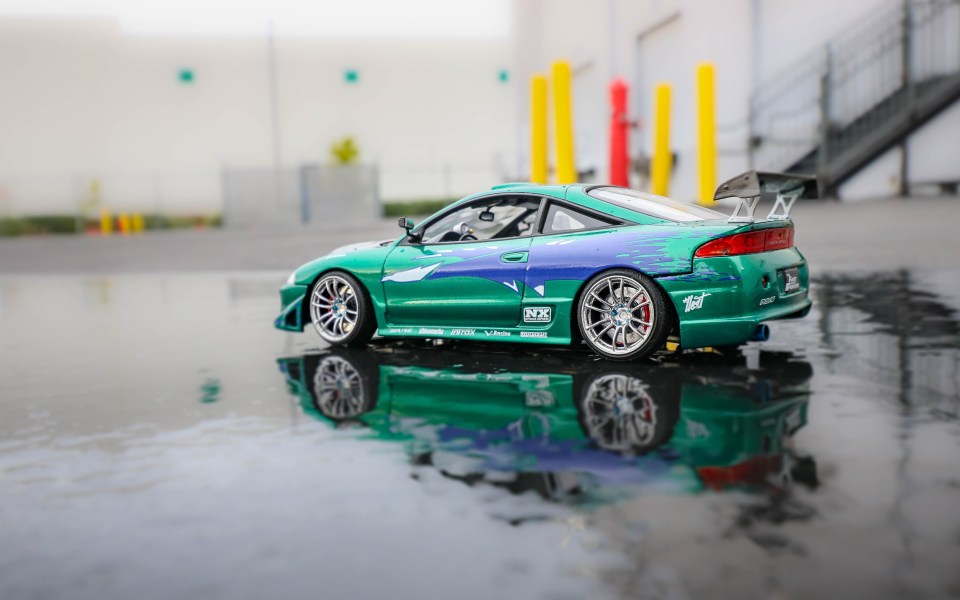
The biggest difference with this rebuild is obviously going to be the paint. I wanted to stay with green and use the original livery decals, but to update the look and make the Eclipse look a little more modern I decided to try out Tamiya’s Metallic Green.
Using the original livery decals that Revell includes with the kit.
I was for sure going to use an aftermarket set of wheels this time around instead of the options Revell included in their kit. These Aoshima 18″ Gram Light 57DR’s were originally used on my NA1 NSX before I swapped that car over to Works. I’ve been meaning to find a car to throw these on for a while – turns out they fit the Eclipse nicely.
Using Molotow Liquid Chrome to chrome the wheels up from their original gunmetal.
One of my biggest regrets with my original build was how ugly the hood turned out. Back then I didn’t really know how to massage large decals over complex surfaces, so the final product had a bunch of wrinkles and creases. To make it all worse I had used Revell’s ugly carbon pattern that they included on their kit sheet – this time I learned my lesson and used proper 1/24 scale carbon from Scale Motorsport.
Compared to the original. Much nicer.
The rest of the sponsor decals on the body I decided to go with white over the original red since it pops better against the darker green body color.
With the wing I decided to go aftermarket too, using mounts from a Tamiya INGS+ set.
The problem with the Revell body is that they give you gigantic holes in the trunk where the original APR wing was supposed to peg into. I was originally going to just be lazy and glue my new wing mounts on top of those holes to cover them up but then really didn’t like the positioning with stands so close together – I wanted them spread on the edges of the trunk deck.
So, the solution is to go back and plug the trunk holes with Bondo and smooth it all back out.
Went out of my way to paint the engine bay in body color this time instead of just drowning it all black.
Dunked all the chrome parts in a vat of Purple Power degreaser to strip them since the original plated chrome looks cheap to me.
I was originally going to be mega lazy and literally just rebuild the exterior and transfer the shell over to my old Eclipse, effectively keeping the original engine and interior. After looking at my original engine build from that car though, I decided it would be easier to just build a new motor from the ground up again.
One little thing that really bugged me about the original Eclipse’s engine is how thin the timing belt/cam gear covers looked.

My solution: spread some bondo on the back edge of the timing cover piece and sand a reverse bevel on the other side to give it some more depth.
Did I strip the valve cover of chrome just to chrome it again myself? Yes.
Made some attempt at separating the silver/gunmetal finishes on the motor.
Firewall painted body color. I hate it when they mold all the details in and make you paint them in by hand – I’d much rather they give us a blank firewall and let me put in actual wiring detail on my own, but alas.
I went back and forth on the radiator/intake piping color for a while – on one hand I wanted to stick to the original blue that the movie car was supposed to have under-hood, on another I also really thought the bright blue with chrome looked way too ricer/tacky. Eventually I settled on going with bright gloss red – much less tacky…right?
I forgot this car actually included a strut bar, even if it was just the incredibly basic stock bar that had basically no features. I’ve scratch-built strut bars before, but I really didn’t feel like going through the effort for this motor. As a compromise, I just went and inserted a thicker bar in place of the original super-thin one.
Block and transmission in.
To add some contrast, I was going to go with a blue cone filter to offset the red intake piping. It ended up looking really cheesy.
I think my main problem stems from Revell’s bubbly mold of their intake cone, so I sliced that off and busted out one of my spare cones leftover from a previous motor build.
Replaced the muffler with a resin aftermarket fart can I had from a Fugu Garage exhaust set.
Realistically there isn’t too much of a difference, but I liked the look of the shorter and thinner tip.
Interior done mostly gray as before, though I added a little red trim to the steering wheel this time and painted the seats black for more contrast. I was also supposed to label the headrests Sparco (since they’re actually Sparco seats), but only had Recaro decals on hand…so they are now Recaros.
A cool idea I really wanted to make happen was running some exposed wire from the aftermarket tach into the dash. Some pindrilling and tweezer work later and it turned out nice, I think.
Revell includes one tiny plastic NOS bottle in this kit, with the nozzle and mounting straps all molded as one piece. I decided to spring for a more movie accurate look with two big boi bottles, fresh from Harry’s.
It’s neat that the Detail Master kit includes everything from the straps to the tilted mounts as photo-etch parts, but good lord are these things hard to work with when they’re the size of less than half your fingernail.
Putting this together took an embarrassingly long time. I do really like that the stands come angled upwards though, that’s going to make mounting for me a lot easier.
The single original NOS bottle from the kit pegged into the section right in the middle behind the center console. I covered the area up with a thin piece of pla-plate so we could mount our new twin tanks.
I actually went back and went scene by scene to find that this is actually how Brian had the tanks mounted in his car, per the movie’s first race scene.
I’ll be the first to confess that I don’t know the first thing about NOS systems or what’s required to run them – I just figure the tanks have to get that laughing gas to the motor somehow, so we’re going with one fitting on each tank connected to some braided line that’ll run under the speaker box into the chassis.
Lots of firewall and engine bay detail had to be painted in my hand.
Interior done. I really wanted to add a red five-point harness system at first, but after I inserted the NOS tanks I didn’t really see a way to realistically run harness points behind the seat cleanly, especially without any sort of roll bar or harness bar.
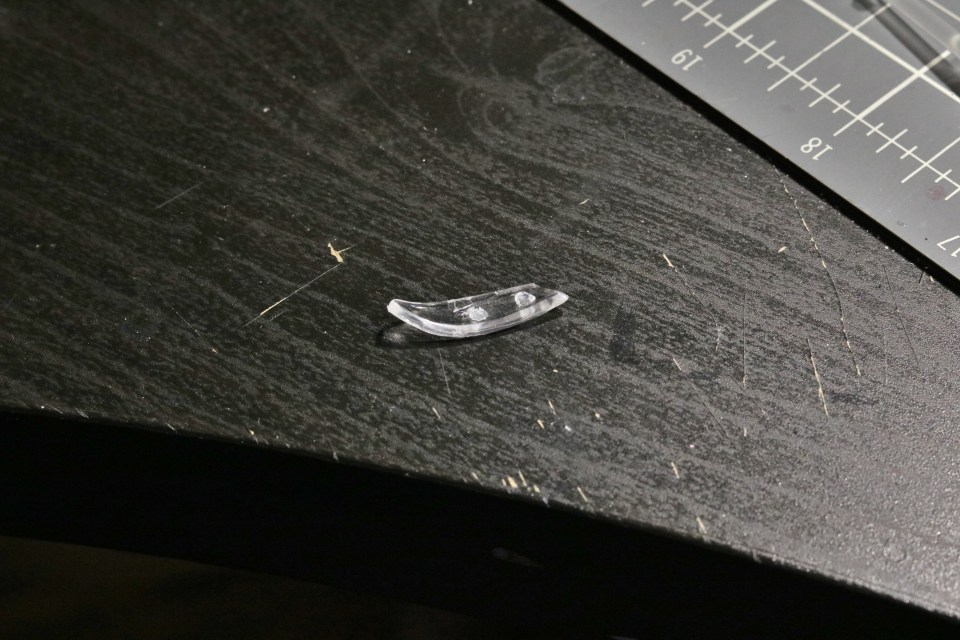
Now for lighting – I mentioned during the original build how I thought Revell’s approach to the headlights on this kit was strange and more than subpar. Recall that the headlight lenses actually had super long clear pegs sticking out of them that would stick right through the actual headlight housings themselves, therefore “pegging” the lenses into place rather than gluing a completely clear lens in.
I thought this approach made the headlights look really ugly and cheap where you could clearly see the clear pegs going into the headlights, so obviously we’re doing away with the pegs entirely.
The lenses are then sanded until the peg markers are completely gone and then polished back up to clear. I’ll be the first to admit “polishing back up to clear” sounds a lot easier than it is, but Revell didn’t leave me much of a choice.
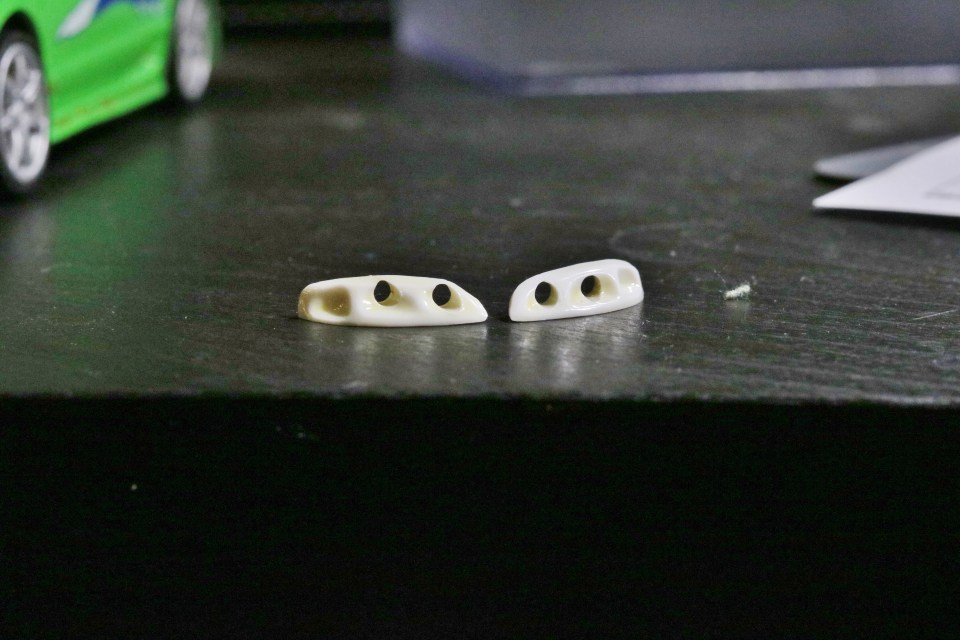
With the lenses turned into actual lenses, the housings can now become actual headlight housings instead of open hole receivers for the lens pegs.
The idea now is to make the most of their original shape, so I’ll be modeling them after some aftermarket DSM headlights that are dual-projector style (the original stock headlights had no projectors). To make this happen all I’m doing is cutting up some little craft gemstones I picked up at the arts store and fitting them into the former peg openings.
One slight hiccup is that the right and left headlight molds aren’t actually symmetrical…see how the middle opening on the right headlight is a lot higher than the one on the left? This is likely from Revell’s not-so-great molding process, since after inspecting my previous Eclipse the headlights are also like this, meaning it’s not just a one-off error.
Widened one hole at the bottom and filled in the top to make both housings a little more uniform.
Bringing the lenses back up to crystal clear proved to be a near-impossible task, no matter how much sanding I did or with how fine my polishes got. I even clear glossed them thinking that would do the trick, but it was only a mild help. In the end, they’re clear – but more of a milky opaque clear.
Revell also never really gave you a real taillight housing…the back of the body was just kind of hollow, and the clear taillight lens went right over it.
To combat this issue, I cut out the original single mount in the middle and replaced it with a strip of pla-plate that covered the entire opening, then filled it in with chrome for a reflective look. The clear red lens that goes over this should now look much more even.
Totally forgot about brakes. I forgot Revell didn’t actually include any brakes with this kit at all (must be a Fast n Furious thing), so there was no even modifying or adding detail to the stock brakes. After digging around I found a set of rotors and calipers I must’ve pulled off some Jada diecast toy moons ago. It’s really not the most realistic look since the rotors are kind of giant and the calipers are all the same size, but for what this is I decided to just roll with it.
The most inaccurate thing Revell probably got wrong with the Eclipse is the lack of carbon fiber aero mirrors with the kit. All you get is the Eclipse’s stock mirrors. Since I had a set of Craft Square mirrors laying around from EightyOne81, I decided to throw them on to complete the look.
Had to cut my own actual mirror face out of pla-plate.
And finally, the much nicer photo-etched hood pins on the car now are from the same Tamiya INGS+ Power GT Wing set I got a while back.
A little more screen-accurate in some ways, but obviously still a pretty radical departure from the faithful movie car.
The wing is actually a BLITZ wing meant for the GT86/FRZ platform, since it came as part of my C1 Models BLITZ BRZ Widebody transkit. I had already carbon fiber’d it way back when and cleared it, so really I threw it on this car just because it was ready to go and I didn’t have to carbon fiber another wing deck.
One of the big must-fixes for me on this build was the stance – I hadn’t modified the suspension on my previous Eclipse at all, so it was showing quite a bit of wheel gap. This time around I went with stretched tires on the Gram Lights and got it as low as I could.
It’s actually really still not as low as I’d like it (I was aiming for laying frame) because the 18″ wheels turned out to be larger than I expected on the DSM body, but I’m still happy with the look.
At one point I even considered scratch-building some carbon fiber splitters and ground effects to bring the body lower to the ground, but decided it had enough carbon between the hood, mirrors, and wing.
Really a lot happier with the headlights and taillights than I expected. I think they’re a major step up from the previous kit.
Motor turned out okay I guess. Not my best work by any stretch, but in my defense I feel like there was only so much I could do given what I had to work with.
I am however pretty happy with how much of the interior you can still see through the windows, especially the Nitrous setup – enough to blow yourself to pieces!
The new motor only looks good next to the old one. I deliberately didn’t go back and update or detail-up any of the old kit’s flaws, so I could see my own skill progression side-by-side.
I go out of my way to try building a stance-y version of the original car and their ride height looks nearly identical next to each other…goddammit.
I really like the idea of taking classic FnF designs and adding a modern touch to them for that similar but different feel. Probably going to try this same style with a Supra next.


4 Comments
Ronny
this is definitely one of the best scalemodelling blog!
I’ve been following this blog for a while by now and this is the best build so far (in my opinion)
those color combination is just perfect.
did you use tamiya metallic green TS-20?
I remember mine turned out to be more green in contrast to your blue-ish green. did you use any base coats like primer or anything?
James Pierce
Thanks Ronny! Yes it was Tamiya’s TS-20 Metallic Green, I actually found that as a metallic color the pigment is kind of thin, so you’re right it needed a good base coat to get some pop in the color. I originally applied it over just primer gray but the color was too pale; I then sprayed the body with Gloss Black and applied the Metallic Green over that – that’s how I got the colors you see here!
dietgilroy
Could you build the 1957 Bel Air Street Machine by AMT? It has lots of detail, an opening trunk, posing steerig, and a tubbed chassis that can fit your usual JDM wheels. I recommend getting some OZ Futura wheels, Bare Metal Foil (or the Tamiya Aluminum Stickers), and a 1/25 distributor to detail the engine more.
James Pierce
It looks like an awesome model, though I’m not super interested in classic American stuff right now – maybe in the future! There’s still a ton of JDM stuff I have on my bench I’m excited to work through