

Tomorrow’s the big day, and now that my comrade’s armor is all but finished, I figured I would shed some light on my own endeavors for this year’s Expo.
Needless to say I’m cosplaying as Zero again. It’s partially because I like the character a lot and partially because I felt like last year’s costume was so lackluster I’m obligated to do it again until I get it right.

Last year’s costume was a pretty bad disaster – I ordered it online from a Chinese retailer and they had no idea what they were doing – click here for the full details. Given that experience, I vowed never to buy my actual costume again unless I see it in person. This year I had my grandmother and a friend of hers help me out in weaving the threads.

She used my costume from last year as reference, while I told her about all the modifications I wanted made. We went out and grabbed some purple/blue fabric as the base, and made everything from scratch. I’m actually very pleased with the fabric color; Zero’s actual costume has been depicted as both blue and purple before, and looking at the anime, it’s almost a weird mix of the two. Given that, I chose a fabric that looks both purple and blue in certain lighting. It’s really pretty funky.

Of course, my grandmother did a pretty superb job with the details on the outfit – last year the gold embellishments on the back weren’t even aligned correctly and actually had stubby tips – I’m glad she managed to sharpen them up.
The collar area was also brought down and extended to make it larger and give more room to show off the neck wrap.
The only real gripe I have with the jacket part is the fact that the zipped up area in the front is too short – it looks like a crop top. This is because last year’s costume was just as short, and I had forgotten to point that out to her to have it fixed. As a result, a bit of my belly would be shown if I wore this without anything underneath, and the actual costume has a much longer zipper that extends down below the waist. A small quirk that was too late to fix, but not the end of the world.

As a result of that little bit showing my stomach, I needed to wear something underneath that would blend in with the rest of the costume. At the very end, we had some of the purple/blue fabric left, so I had mother dearest sow it together with a white tank-top. This was really done mostly to keep myself cool; if AX is anything like last year, we’ll be spending 3+ hours in the blistering sun outside in line.

That’s me on the right from last year – notice that bit of my gray shirt showing around my tummy area, along with my belt. Wanted to avoid that this time, but what can you do.
The tank-top itself also had to be shortened so it barely covered my belt area. While I do look like white trash when I wear nothing but the tank-top, it works fairly well when everything’s put together.

Unfortunately, I didn’t get the proper lavender fabric to my grandmother in time for her to make the collar and sleeves the appropriate color, so like last year I had to paint the fabric.

The paint used. I just ran to Wal-Mart and picked up any small bottles of lavender paint I could find – I usually don’t use this brand, but it actually works really well. I’m not sure if “multi-surface” extends to fabric, but it came out with a really nice finish and dried in no time.

Painting away at the collar. The gold bits on the collar and sleeves were already cut and sown on for me, so I didn’t have to draw them on as I did last year. It took roughly half an hour to do each sleeve and an hour to get the entire collar painted. Needless to say, those areas are rather stiff thanks to the paint, but I only needed about one layer (sans a few touch-ups here and there).

The gold highlights on the costume were all sown on – apparently this gold is very slippery and hard to put on via sowing, so many props to my grandmother and her friend for being able to do it as well as they did.

Pants are pretty much on point – can’t really go wrong with them. I gave my grandmother a pair of my regular jeans to base the size off of. She even added a gold belt button and side pockets.

However, it turns out side pockets weren’t really enough, so I had mother dearest sow on some large back pockets for my prop and wallet. I have four pockets total on the pants.

Thanks to last year’s costume, my grandmother thought the only way to do the boots would be to make footsies again. I told her that I was going to avoid this option at all costs for this year’s cosplay, but once she had seen the idea from last year, she wasn’t open to anything else. She did make these slightly more compact, but they still looked giant on my boots. I tried to explain to her the idea that I had for the boots, but she was adamant on these. So I took matters into my own hands…

I had bought a pair of gray Marc Anthony boots just for the occasion of being Zero, and my original plan was to paint them to match the rest of my outfit. Unfortunately, there’s no paint that matches the fabric perfectly, so I opted to just use the actual fabric itself. I gutted the footsies my grandmother made and re-purposed the fabric to cover my actual boots. The fabric was attached via fabric glue, and while not perfect (as the seams are still slightly visible) it does look worlds better than the footsies.

The gold parts were glued on after they were cut to size. Unfortunately since they’re a bit thinner, the glue seeped through and a few blotches can be seen on the gold. I could’ve painted over the fabric with a matching gold, but I got lazy and decided that it was good enough – the overall look works well, and I doubt anyone will be examining my boots in detail.

Used the same gloves as last year, the bridesmaid ones that went past my elbows. Due to the difficulty of removing them before, I cut them down to size. Unfortunately given their wear, a few small holes are starting to appear; the fabric was thin to begin with, and could barely stand up to two washes. I had a few of the largest holes sown up, but many areas are stretching very thin. Going to have to replace them next year…

For the neck wrap, last year’s that came with the costume I bought was pretty pathetic. I cut up one of my white t-shirts to use before, but this year I hit Wal-Mart and bought a cheap roll of white fabric; it was two yards long and relatively cheap. I cut it down to size in width, so it was thinner but still two yards, and finally figured out a good way to wrap it (courtesy of Google images).

The button that went on the neck wrap was originally intended to be removable, as I glued the button onto last year’s wrap and it was tough adjusting everything so the button showed in just the right area when the wrap was just the right length. As a result, I bent an odd-shaped safety pin and glued the button on the end (I’m not sure why that safety pin was rounded at the end, but hey it works).

However, I soon discovered that the safety pin method didn’t really work well; it was too much of a hassle trying to pin it facing up, so I just removed the button (it came off rather easily…looks like it wouldn’t have been durable even if I used it). I painted it with some midnight blue acrylic paint and hit it with a coat of dull Testor’s spray before I glued it straight onto the wrap as I did last year.

The cape was probably my biggest gripe with this iteration of the costume – it’s simply not big enough. I’m using the same cape that came with the one I bought from the Chinese seller last year, as they actually pulled the look off well; it was just too small for me. It should extend to almost reach the floor, but given my massive height (6 feet tall exactly, 6″2 with the boots on) it stops above my ankles. Very annoying. Therefore, I asked my grandmother to make it both wider (so I can do some fabulous cape flourishes) and longer so it doesn’t look undersized.
Unfortunately, she could only do the former, and not at a great extent. The above dark red area is new fabric to indicate where the cape was extended, as we couldn’t find the exact red fabric that the seller used. The difference in actual width is neglectable, but grandmother didn’t want to extend it due to it looking funky if there was a horizontal cut and insertion running through the cape, both on the inside and out. While understandable, I still would have preferred the extension, even if it wouldn’t be totally seamless.


The above is the extent of what I could pull off last year, gravity included. The bottom is what I’m shooting for, complete with a fan installed in my arse to blow the cape for dramatic effect.
I did request for a whole new cape to be made in the first place to avoid any of these size extension problems, but grandmother was discouraged by the collar area. She had no idea how to make the thing stand up as it should, and didn’t understand when I tried to explain putting wires inside to hold it up. Communication is difficult when speaking different languages.
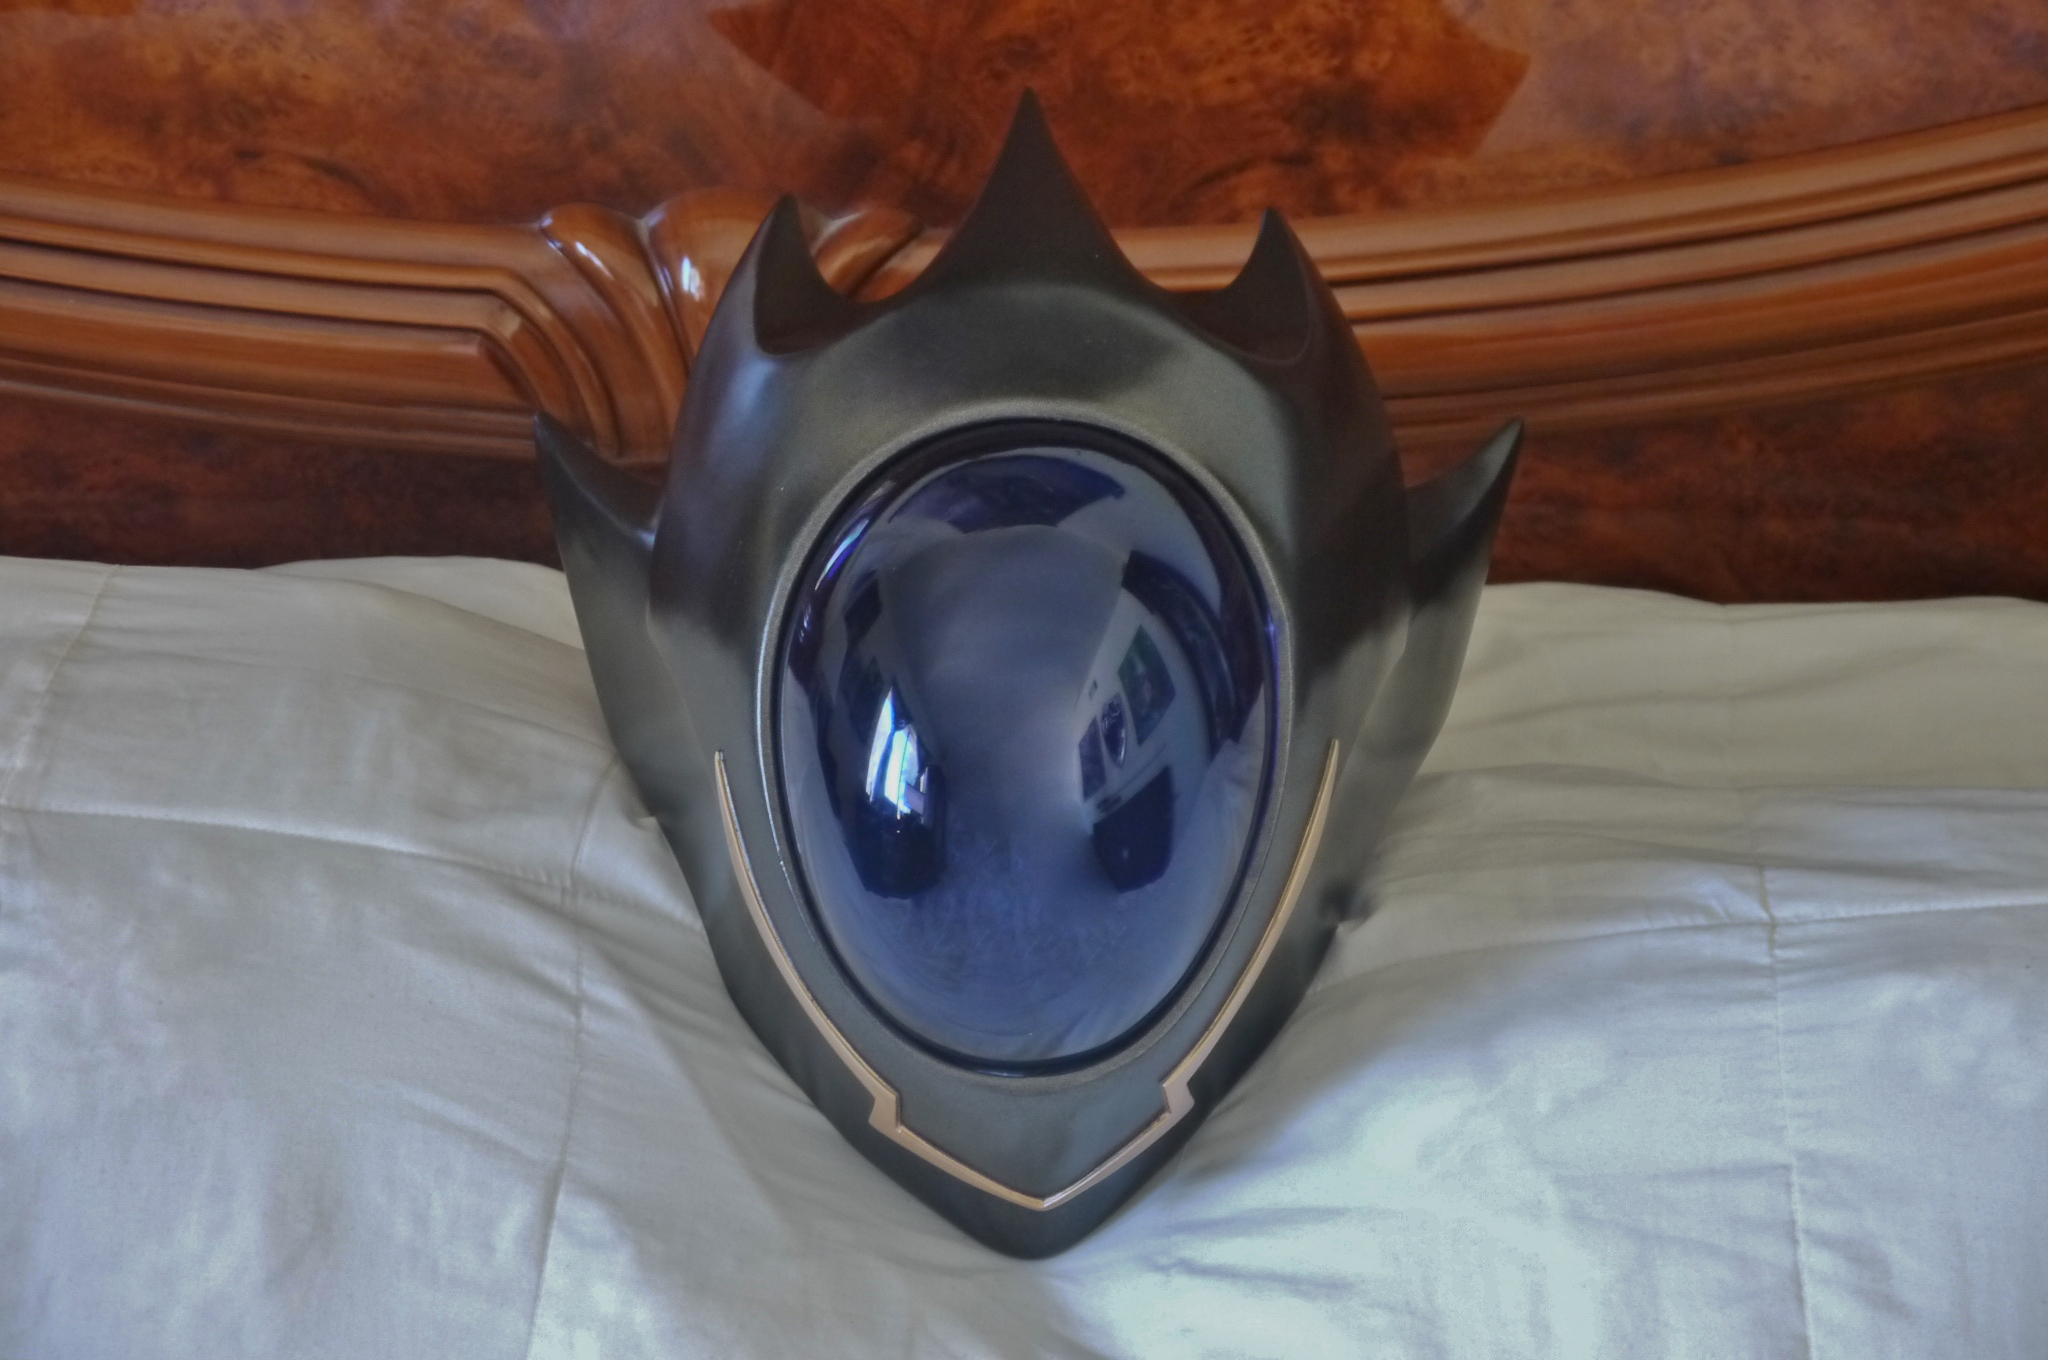
Ah, the mask. I’m not sure if I mentioned it before, but I actually sold the mask I used last year for how much I bought it for – meaning I basically got to use it for three days for free. This year, since I needed it again, I bought the exact same thing from the same seller on eBay for the same price. I do plan to sell this one back again after the Expo, as the $150+ price tag sets me back a fair amount every time.

As I said, the mask is the exact same so nothing really special – I noticed that this time around it has a more candy black finish than the last one, and best part is it came intact in packaging. The last one I had to glue the blue visor area back in place because it broke in transit.

I did, however, make one slight modification. A problem I had with last year’s mask is that you could see my face through it – my face was literally pressed up against the blue clear area, so it wasn’t hard to discover Zero’s true identity at the Expo.

See, my face through the mask. Not very stealthy or incognito for a wanted terrorist.

To remedy that issue, I got a piece of thin black fabric and duct taped it to the inside of the mask. The fabric is thin enough to see through, especially since I’m wearing contacts instead of glasses under the mask this year, and it catches my face so it doesn’t end up pressed against the clear blue. It actually works surprisingly well, despite how simple the method is. Downside is that my vision isn’t as clear with the helmet on, but it never really was to begin with.

And last but not least, I needed one last new addition to the outfit to complete the look and make sure I one-upped all other Zeros I saw at the ‘con (I know, call me competitive and self-serving). I’ve always wanted a Britannian officer pistol, but never knew where to find one or who to commission to make one. A quick Google images search revealed the following image:

Apparently someone had done it, and made it out of wood no less. Of course, it’s just a prop, not a real weapon. After seeing the page on this, I decided to shoot the creator an email through their blog, never expecting a reply. He had made this thing way back in 2011, and I never really expected to have the guy actually get back to me accepting my commission request. But lo and behold, I was pleasantly surprised when he actually replied and said he could make it within the deadline to boot.

He even said he would update the design for me, essentially making my gun a 2.0 version of the original, and it shows. The one shown above in a darker gray is his first version, while this one (shown primed right before he started painting it) is the version I received. The fellow did mention that he only makes collector-grade props, not cosplay-grade ones. While I could have gone with a cheaper alternative, I couldn’t pass up the opportunity for something so stunningly accurate and well-made.

His finished product. Looks amazingly clean doesn’t it? I was most impressed with his craftmanship, and while this prop did come at quite a hefty price, it was worth every penny. The grip is admittedly a bit large when I hold it, and it looks a bit shorter than I expected, but the maker explained everything to me about his design choices, and it made sense. At the end of the day I was very satisfied with what I got. Now I’m just afraid to take it to the Expo for fear of scratching or breaking it.

So there it is. I should be all ready for the ‘con, with any luck nothing will fall apart on me and it’ll last all four days. I can already tell I’m going to melt into a puddle of sweat though – just test fitting it in my room makes me break out in nervous heat.


